In today’s world, where sustainability and self-sufficiency are increasingly important, growing your own vegetables at home is not only rewarding but also eco-friendly. What if I told you that some of your everyday waste—plastic bottles—can be transformed into a mini garden? By recycling plastic bottles, you can create an efficient, space-saving, and environmentally conscious vegetable garden right on your balcony, windowsill, or kitchen counter. Here’s a complete guide to help you get started.
Why Use Plastic Bottles for Gardening?
Plastic bottles are one of the most common pollutants worldwide, taking hundreds of years to decompose. Repurposing them for gardening offers multiple benefits:
- Eco-Friendly: Reduces waste and helps prevent pollution.
- Cost-Effective: No need to buy pots or planters.
- Space-Saving: Ideal for small apartments, balconies, or urban spaces.
- Portable: Easy to move, adjust, or rearrange depending on sunlight or weather.
With a little creativity, these bottles can become vertical gardens, hanging planters, or self-watering containers for your vegetables.
Materials You’ll Need
To start your plastic bottle garden, you’ll need:
- Empty plastic bottles (1–2 liters work best)
- Scissors or a craft knife
- Soil (preferably organic or potting mix)
- Seeds or seedlings (vegetables like lettuce, spinach, tomatoes, herbs, or peppers)
- Water
- String or hooks (for hanging gardens, optional)
Optional materials: gravel or small stones for drainage, fertilizer, and a tray for drip water.
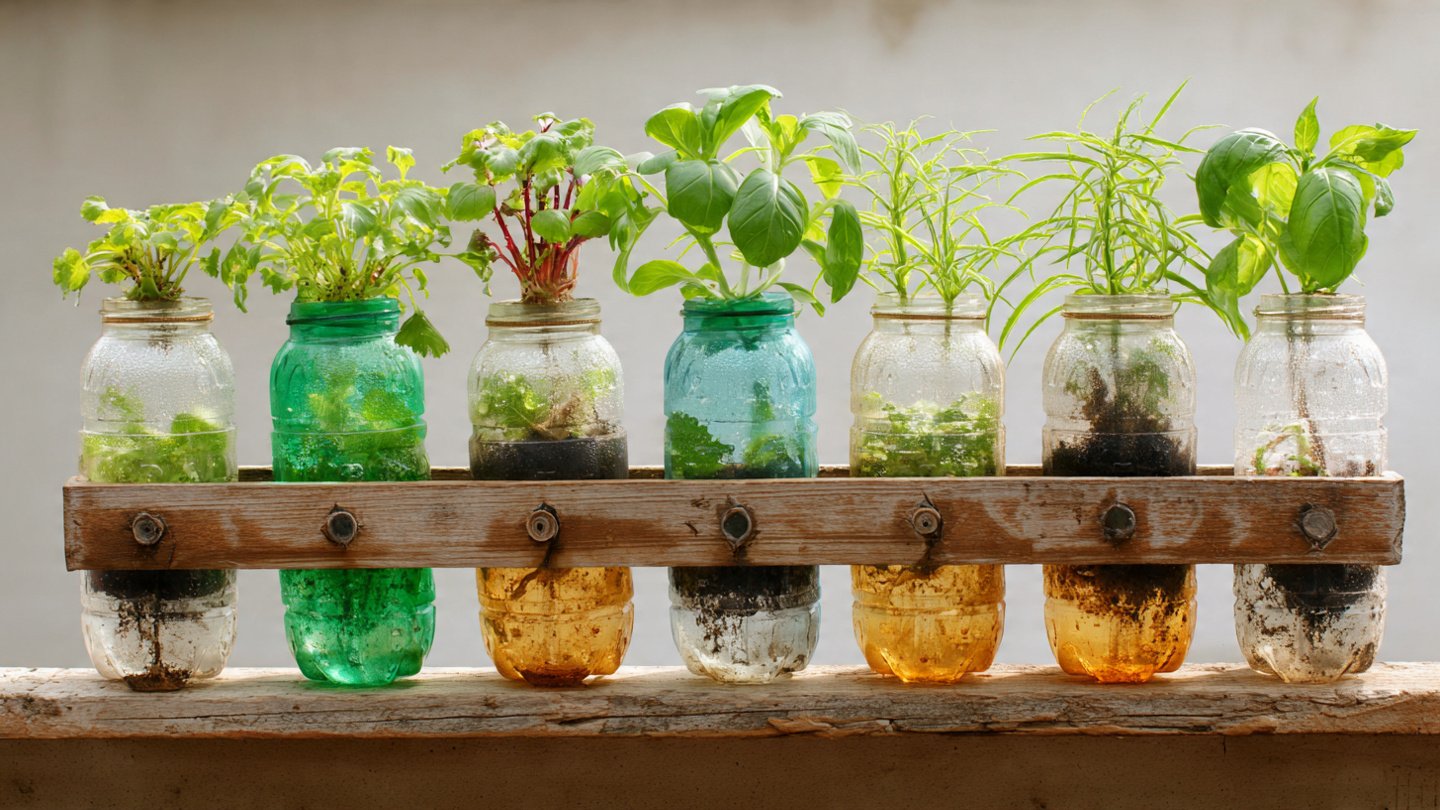
Preparing Your Plastic Bottles
- Clean the Bottles: Wash the bottles thoroughly to remove labels and residues. This prevents mold or bacteria from affecting your plants.
- Cut Openings: Depending on your design:
- For side planters, cut a rectangular opening along the side of the bottle.
- For top planters, cut the top portion to make a funnel-like opening.
- Leave at least 1–2 inches of space from the bottom to prevent soil from spilling.
- Create Drainage Holes: Punch small holes at the bottom of the bottle to allow excess water to escape. This prevents root rot.
Choosing Vegetables for Plastic Bottle Gardens
Not all vegetables thrive in limited soil space, so select small or fast-growing varieties:
- Leafy greens: Lettuce, spinach, kale, and arugula grow quickly and don’t require deep soil.
- Herbs: Basil, parsley, coriander, mint, and chives are perfect for bottle gardens.
- Small fruiting plants: Cherry tomatoes, chili peppers, and dwarf eggplants can grow in larger bottles.
- Root vegetables: Radishes and green onions are suitable for vertical bottle setups.
Planting Your Vegetables
- Layer the Bottom: Add a small layer of gravel or stones for drainage.
- Add Soil: Fill the bottle with potting mix or nutrient-rich soil. Leave enough space for roots to grow.
- Plant Seeds or Seedlings: Plant seeds according to package instructions or transfer seedlings carefully into the bottle.
- Water Gently: Ensure the soil is moist but not waterlogged.
Tip: If you are planting multiple bottles vertically, stagger the heights to ensure each plant gets enough sunlight.
Creative Designs for Bottle Gardens
1. Vertical Bottle Garden
Stack bottles vertically or hang them with strings against a wall. Cut a side opening for each bottle to plant seeds. This design saves space and is perfect for small balconies.
2. Hanging Bottle Garden
Use ropes or hooks to suspend bottles from a balcony railing or ceiling. Plant herbs or leafy vegetables, and water carefully to avoid drips.
3. Self-Watering Bottles
Cut a bottle in half and invert the top part inside the bottom half. Fill the bottom with water and let the soil wick moisture up to the roots. This reduces the frequency of watering and ensures consistent moisture for your vegetables.
Caring for Your Plastic Bottle Garden
- Sunlight: Place your bottles where they receive 4–6 hours of sunlight daily. Leafy greens may tolerate partial shade, while fruiting vegetables need more light.
- Watering: Check soil moisture regularly. Vertical setups may dry faster, so frequent watering might be necessary.
- Fertilization: Use organic liquid fertilizer every 2–3 weeks to replenish nutrients in small soil volumes.
- Pruning and Harvesting: Trim leaves to encourage new growth. Harvest vegetables regularly to prevent overcrowding and promote continuous production.
Benefits Beyond Gardening
Creating a plastic bottle vegetable garden doesn’t just help the environment—it also improves your lifestyle:
- Reduces grocery costs: Fresh vegetables and herbs at your fingertips save money.
- Promotes healthy eating: Growing your own food ensures no pesticides or chemicals.
- Educational: A fun way for children and adults alike to learn about sustainability and plant growth.
- Aesthetic Appeal: A vertical or hanging garden adds greenery and life to your home.
Tips for Success
- Rotate Bottles: Rotate bottles occasionally to ensure even sunlight exposure.
- Label Plants: Keep track of different vegetables and herbs for easier care.
- Avoid Overcrowding: Give each plant enough space to grow properly.
- Repurpose Continuously: Reuse bottles year after year for new crops.