One of the most effective ways to ensure a thriving garden is to pre-sprout your seeds before planting. Pre-sprouting, also called seed soaking, germination, or sprouting, is the process of starting seeds in a controlled environment to encourage early germination. By giving seeds a head start, gardeners can achieve faster growth, higher germination rates, and stronger seedlings. In this guide, we’ll explore why pre-sprouting seeds is so beneficial, the methods you can use, and step-by-step instructions to help your garden flourish.
Why Pre-Sprouting Seeds Matters
Pre-sprouting seeds can dramatically increase your chances of garden success. Here are the main reasons why it works:
1. Ensures Faster Germination
Some seeds can be slow to germinate when sown directly in soil. Pre-sprouting allows seeds to begin the germination process in a controlled environment, bypassing soil-related obstacles. This results in:
- Shorter time to sprout
- Faster seedling development
- Earlier harvests for vegetables, herbs, and flowers
2. Improves Germination Rates
Not all seeds germinate at the same rate, and some may fail due to poor soil conditions, inconsistent moisture, or pests. By pre-sprouting, you can:
- Identify viable seeds early
- Discard seeds that fail to sprout
- Reduce wasted space in your garden
3. Gives Young Plants a Head Start
Seeds that are pre-sprouted develop strong roots and shoots before planting. This head start helps seedlings withstand:
- Transplant shock
- Pests and diseases
- Environmental stress like heat or cold
4. Saves Garden Space
Instead of planting multiple seeds and waiting to see which ones grow, pre-sprouting allows you to plant only successful seedlings. This maximizes your available garden space.
Which Seeds Benefit Most from Pre-Sprouting
While most seeds can be pre-sprouted, some benefit more than others, particularly those with:
- Hard seed coats: Beans, peas, corn, and nasturtiums germinate more reliably after soaking.
- Slow germination: Carrots, parsnips, and some flower seeds respond well to pre-sprouting.
- Large seeds: Sunflower, pumpkin, and squash seeds are easier to monitor and handle when pre-sprouted.
Tiny seeds, like lettuce or cilantro, usually do not require pre-sprouting but can still benefit from consistent moisture during germination.
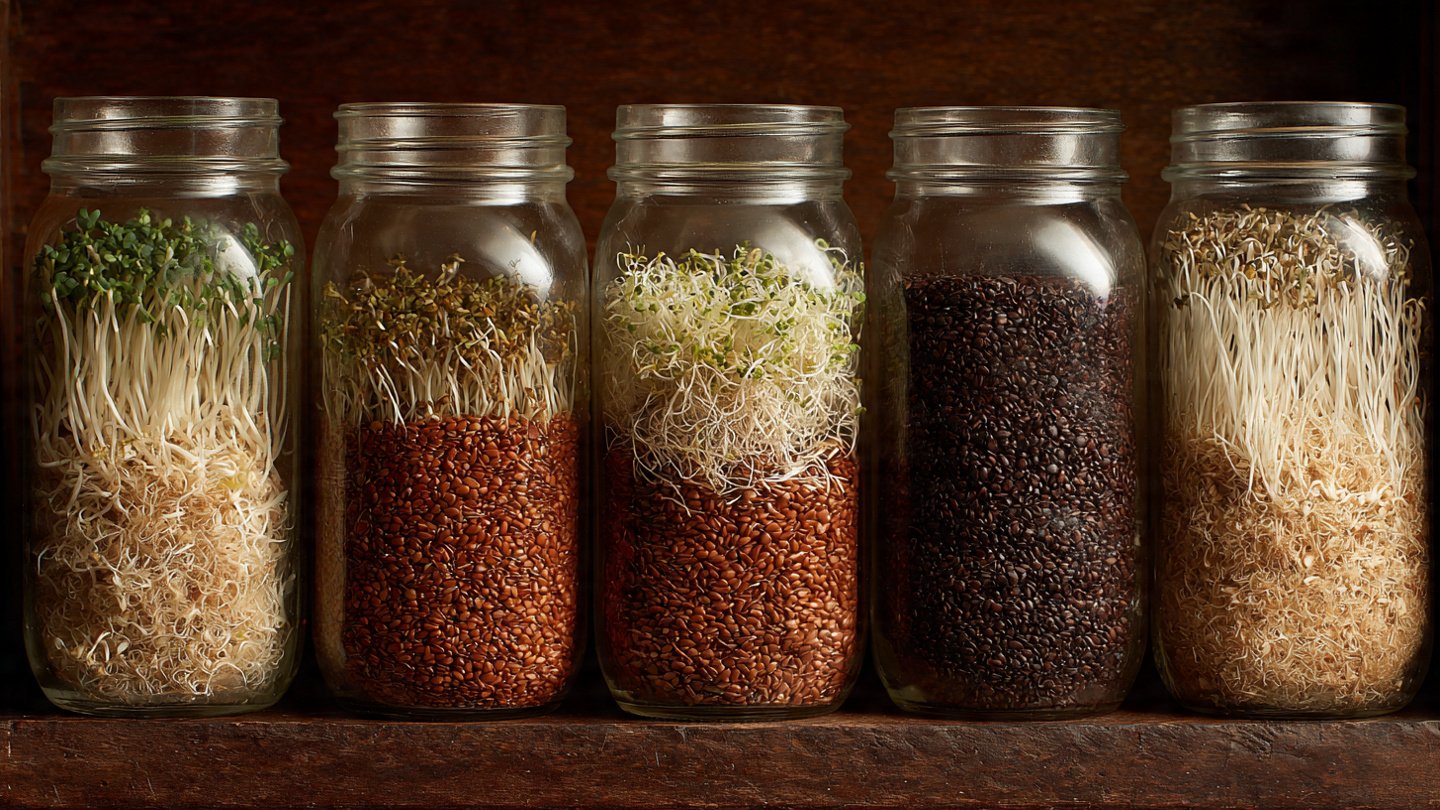
Materials Needed for Pre-Sprouting Seeds
You don’t need fancy equipment to pre-sprout seeds. Common household items often work perfectly:
- Seeds: Choose fresh, viable seeds.
- Containers: Plates, shallow trays, jars, or resealable bags work well.
- Moist medium: Paper towels, cotton cloth, or fine soil for holding moisture.
- Water: Clean, room-temperature water for soaking.
- Optional: Spray bottle, labels, or small plant trays for transplanting.
With simple materials, pre-sprouting becomes a straightforward, low-cost technique.
Step-by-Step Guide to Pre-Sprouting Seeds
Here’s a methodical approach to pre-sprouting seeds:
Step 1: Soak Seeds
- Place seeds in a clean container and cover with room-temperature water.
- Soak seeds for 6–24 hours depending on the size and type:
- Small seeds: 6–8 hours
- Medium seeds (beans, peas): 8–12 hours
- Large seeds (sunflowers, squash): 12–24 hours
- Drain seeds thoroughly after soaking to prevent mold.
Tip: Hard-coated seeds like beans or peas may benefit from overnight soaking, which softens the coat and speeds germination.
Step 2: Place Seeds in a Moist Medium
- Lay a damp paper towel or cotton cloth in a shallow container.
- Spread seeds evenly, ensuring they do not touch each other to avoid fungal growth.
- Cover with another damp paper towel if desired.
Maintaining consistent moisture is crucial at this stage. Seeds should be damp but not waterlogged.
Step 3: Provide Proper Conditions
- Keep the container in a warm area, typically 65°F–75°F (18°C–24°C), away from direct sunlight.
- Check seeds daily to ensure the medium remains damp. Mist with water if necessary.
- Avoid overwatering, as soggy conditions promote mold or rot.
Warmth and moisture are the two critical elements that trigger germination.
Step 4: Monitor for Sprouts
- Seeds usually show the first signs of sprouting within 2–10 days, depending on the variety.
- Look for tiny white roots (radicles) emerging from the seed coat.
- Discard any seeds that fail to sprout or show signs of mold.
Monitoring ensures that only healthy seedlings go into your garden.
Step 5: Transplant to Soil
Once seeds have sprouted:
- Prepare pots, seed trays, or garden beds with well-draining soil.
- Carefully transfer each seed, root first, into soil.
- Cover lightly with soil and water gently.
- Provide filtered light or partial shade until seedlings are established.
Pre-sprouted seedlings transplant more easily and are less prone to shock than dry seeds sown directly.
Tips for Successful Pre-Sprouting
- Label Seeds: If sprouting multiple varieties, label them to avoid confusion.
- Use Fresh Seeds: Older seeds may have lower germination rates.
- Maintain Cleanliness: Wash containers and trays before use to prevent mold.
- Rotate the Medium: Change paper towels or soil if mold appears.
- Gradually Acclimate Seedlings: Before planting outdoors, harden seedlings by exposing them to sunlight and outdoor conditions gradually.
Following these tips helps reduce failure rates and ensures healthier plants.
Advantages Beyond Germination
Pre-sprouting seeds provides additional benefits for gardeners:
- Predictable Growth: You know exactly which seeds will succeed, reducing wasted effort.
- Faster Harvest: Pre-sprouted seeds reach maturity earlier than seeds sown directly.
- Stronger Plants: Early root and shoot development gives seedlings a competitive edge over weeds.
- Flexibility: Pre-sprouted seeds can be started indoors, allowing gardening to begin before the growing season.
These advantages make pre-sprouting an essential technique for both novice and experienced gardeners.
Common Mistakes to Avoid
Even experienced gardeners can encounter issues when pre-sprouting:
- Overwatering: Leads to mold and rot. Keep seeds moist, not soggy.
- Crowding Seeds: Prevents airflow and can increase disease. Space seeds apart.
- Ignoring Temperature: Too cold or hot slows germination or kills seeds.
- Delayed Transplanting: Sprouts left too long in the medium may develop long, weak roots.
Avoiding these mistakes ensures your pre-sprouting efforts translate into a healthy garden.
Conclusion
Pre-sprouting seeds is a simple yet powerful method to improve your gardening success. By giving seeds a head start in a controlled environment, you can enjoy faster germination, stronger seedlings, and higher overall yields. This technique is especially beneficial for seeds with hard coats, slow germination rates, or larger seeds that are easier to monitor.
By following a structured process—soaking seeds, providing a moist medium, monitoring sprout development, and transplanting carefully—you set your garden up for success. Coupled with proper care, pre-sprouting not only saves space and effort but also reduces uncertainty, allowing you to plant only healthy, viable seedlings.
Whether you are growing vegetables, herbs, or flowers, pre-sprouting seeds is a small investment of time that produces big rewards. It’s a gardener’s secret to getting a jump start on the growing season and ensuring a lush, productive garden.