Microgreens are tiny, nutrient-packed versions of vegetables and herbs that have taken the culinary world by storm. From vibrant red amaranth to spicy radish greens, microgreens are a favorite for home cooks, smoothie enthusiasts, and health-conscious individuals alike. But what if you don’t have access to quality soil—or want a cleaner, low-maintenance method for growing these greens? Enter coconut coir, a natural, soil-free medium that makes microgreens easy to grow at home.
In this guide, we’ll show you why coconut is perfect for microgreens and exactly how to grow them effortlessly.
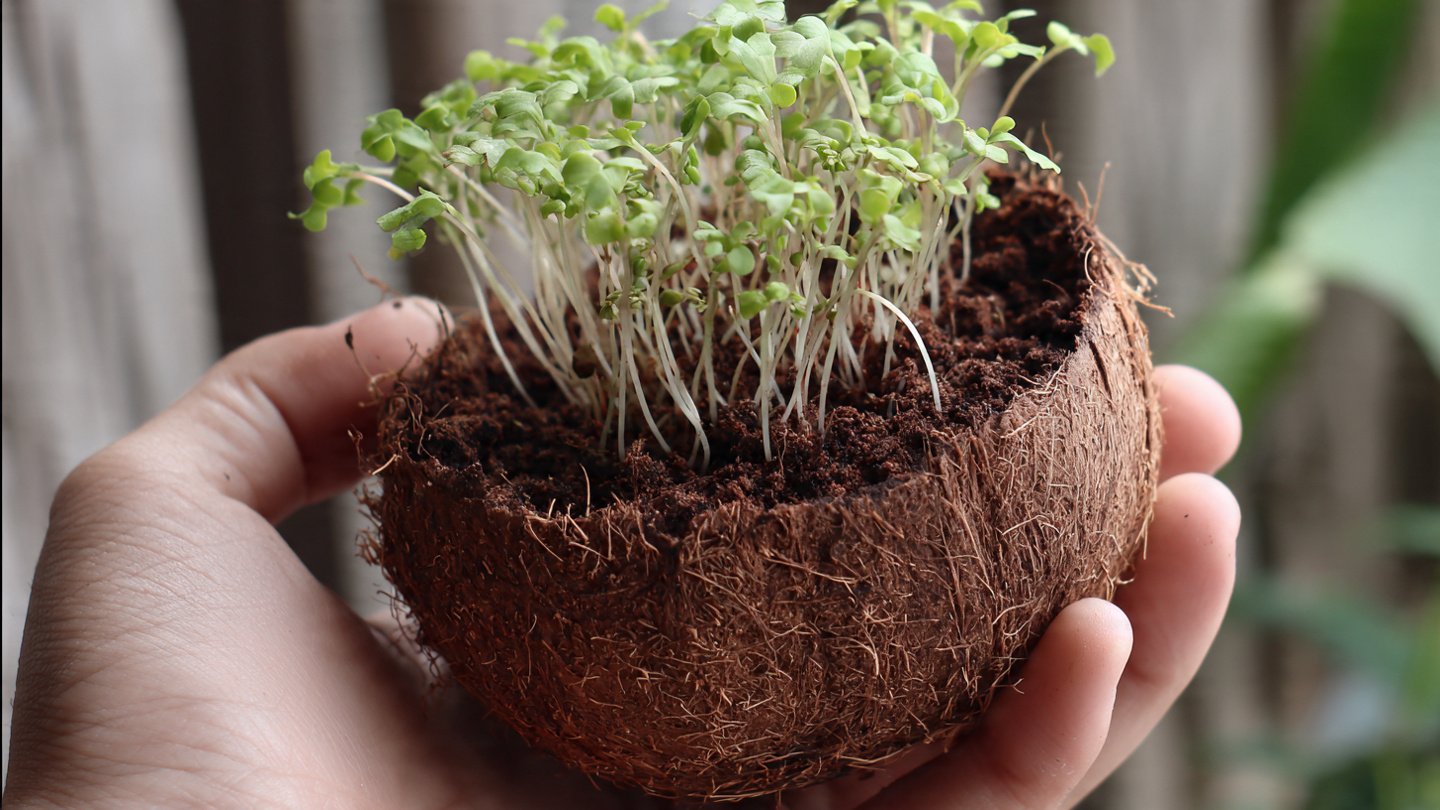
Why Use Coconut for Microgreens?
Coconut coir is the fibrous material extracted from the husk of coconuts. It has become a popular growing medium for both indoor and hydroponic gardening because of its unique properties:
- Water Retention: Coconut holds water exceptionally well, keeping microgreens consistently hydrated without overwatering.
- Aeration: The fibers provide excellent airflow around roots, preventing mold and root rot.
- pH Neutral: Coconut is slightly acidic to neutral, ideal for a wide range of microgreens.
- Sustainable: Unlike peat moss, coconut is a renewable resource.
- Clean and Lightweight: Easy to handle indoors and doesn’t leave messy dirt behind.
Because microgreens are harvested in just 7–21 days, coconut coir offers a convenient and fast-growing medium that doesn’t require soil at all.
Materials You’ll Need
To start your coconut microgreen garden, gather the following items:
- Coconut coir (compressed bricks or loose fiber)
- Seeds for microgreens (radish, broccoli, arugula, basil, or sunflower are popular choices)
- Shallow trays or containers with drainage holes
- Water spray bottle
- Optional: a light misting dome or plastic cover to maintain humidity
Step 1: Prepare the Coconut Coir
If using compressed coconut bricks:
- Soak the brick in water for 15–20 minutes until it expands and becomes fluffy.
- Fluff it up with your hands to break up clumps.
- Drain excess water—the coir should be moist but not soggy.
Loose coconut coir can be used directly after moistening. The goal is to create a soft, even layer in your tray about 1–2 inches thick.
Step 2: Sow the Seeds
- Evenly spread seeds across the surface of the coconut coir. Microgreens can be densely planted because they are harvested young.
- Lightly press the seeds into the coir. Avoid burying them too deep; most microgreen seeds just need contact with the medium to germinate.
- Mist gently with water to moisten the seeds.
Tip: Some seeds, like sunflower or pea shoots, may benefit from a light covering of coir to keep them in place.
Step 3: Maintain Moisture and Humidity
Microgreens need consistent moisture to sprout quickly:
- Spray water 1–2 times daily to keep the coconut coir damp.
- Optional: Cover the tray with a clear plastic lid or dome to create humidity, which speeds up germination.
- Ventilation: Remove the cover once seedlings start to sprout to prevent mold growth.
Coconut coir’s water-holding ability reduces the risk of overwatering, making it ideal for busy growers.
Step 4: Provide Adequate Light
Microgreens need bright, indirect light to develop vibrant color and flavor.
- Place trays near a sunny windowsill.
- If natural sunlight is limited, use a LED grow light for 12–16 hours per day.
Light not only helps them grow but also ensures they develop nutrients and color, making your microgreens both tasty and visually appealing.
Step 5: Harvest Your Microgreens
Microgreens are typically ready to harvest 7–21 days after sowing, depending on the variety:
- Look for seedlings that have developed their first set of true leaves.
- Use scissors to cut just above the coir layer, leaving the roots behind.
- Rinse gently and enjoy fresh in salads, sandwiches, smoothies, or as a garnish.
Coconut coir can often be reused for a second round of microgreens after rinsing and refreshing the medium.
Advantages of Coconut Microgreens
- Faster Growth: Retains moisture and oxygen efficiently for rapid germination.
- Cleaner Harvest: No messy soil means easier handling and eating.
- Sustainable: Eco-friendly and renewable growing medium.
- Reusable: Can often be refreshed and used for multiple planting cycles.
- Pest-Resistant: Less risk of soil-borne pests or diseases.
Tips for Success
- Keep trays shallow: Deep trays can retain too much water and cause mold.
- Rotate trays: Ensures even light exposure for uniform growth.
- Seed spacing: Avoid overcrowding extremely large seeds like sunflower, which need a bit more space.
- Use fresh coconut coir: Older, dry coir may not retain water well.
Popular Microgreens to Grow in Coconut
- Radish: Spicy, fast-growing, ready in 7–10 days.
- Broccoli: Mild flavor, packed with nutrients.
- Sunflower: Nutty taste, crunchy texture.
- Arugula: Peppery flavor, great for sandwiches and salads.
- Basil: Aromatic and flavorful, perfect for garnishing dishes.