Urban living has a funny way of shrinking our dreams along with our square footage. Balconies turn into storage zones, windowsills host forgotten mugs, and the idea of a lush garden feels like a luxury reserved for people with yards. Enter the bottle garden. Compact, affordable, and surprisingly elegant, bottle gardens turn everyday containers into tiny green worlds that thrive in the smallest spaces.
A bottle garden is exactly what it sounds like: a self contained mini garden created inside a glass bottle, jar, or similar transparent container. It is part science experiment, part interior décor, and part quiet rebellion against the idea that you need space to grow plants. Whether you live in a studio apartment, a dorm room, or a busy household with little spare room, bottle gardening lets greenery sneak back into your life.
This guide walks you through everything you need to know to make your own bottle garden, from choosing the right container to long term care.
Why Bottle Gardens Are Perfect for Small Spaces
Bottle gardens are small but mighty. They work well because they create a controlled environment where moisture, humidity, and temperature remain relatively stable. This makes them low maintenance and forgiving, even for beginners.
They are ideal for:
- Apartments with limited natural space
- Office desks and shelves
- Kitchen counters and bathroom windows
- People who forget to water plants regularly
- Creative decorators looking for living art
Beyond practicality, bottle gardens are visually captivating. They invite you to peer inside, like a tiny forest behind glass, quietly growing while you go about your day.
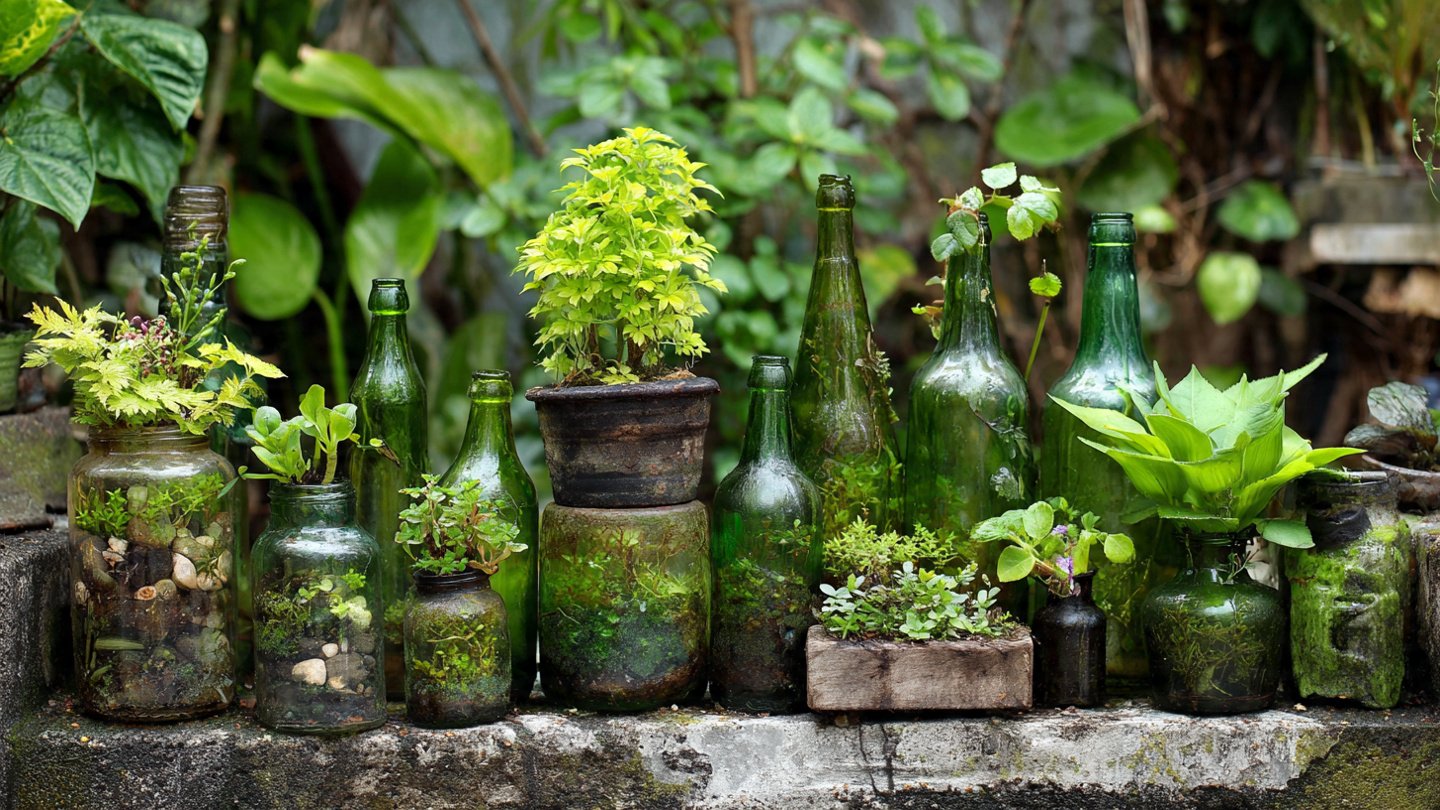
Choosing the Right Bottle or Container
The container is the foundation of your bottle garden. Clear glass is essential because plants need light to photosynthesize. Avoid colored or frosted glass, which blocks sunlight.
Good container options include:
- Glass bottles with wide mouths
- Mason jars
- Old fish bowls
- Glass vases
- Large jam or pickle jars
Wide openings are easier to work with, especially for beginners. Narrow neck bottles look beautiful but require tools like long tweezers or chopsticks to position plants.
Before starting, wash the container thoroughly with warm water and mild soap. Make sure it is completely dry before adding anything inside.
Selecting the Right Plants
Not all plants enjoy life in a bottle. The best choices are slow growing plants that love humidity and do not need frequent pruning.
Excellent plants for bottle gardens include:
- Moss varieties
- Fittonia (nerve plant)
- Small ferns
- Pilea
- Baby tears
- Peperomia
- Miniature philodendron
Avoid plants that grow too tall, require direct sunlight, or prefer dry soil, such as succulents or cacti, unless you are creating an open bottle garden with airflow.
Stick to plants with similar light and water needs to keep everything balanced.
Materials You Will Need
Creating a bottle garden does not require expensive tools. Most items are easy to find or already at home.
Basic materials include:
- Clean glass bottle or jar
- Small pebbles or gravel
- Activated charcoal
- Potting soil or terrarium soil
- Small plants
- Moss or decorative stones
- Long spoon, chopsticks, or tweezers
Activated charcoal is important because it keeps the environment fresh by absorbing odors and preventing mold growth.
Step by Step Guide to Making a Bottle Garden
Step 1: Create a Drainage Layer
Start by adding a layer of pebbles or gravel at the bottom of the container. This layer helps excess water collect away from plant roots, preventing rot.
Aim for about one to two inches, depending on the size of your bottle.
Step 2: Add Activated Charcoal
Sprinkle a thin layer of activated charcoal over the gravel. This acts as a natural filter, keeping the mini ecosystem clean and healthy over time.
Step 3: Add Soil
Gently pour potting soil into the bottle. The soil layer should be deep enough for roots to settle comfortably but not so deep that plants crowd the top.
Use a spoon or folded paper funnel to guide soil into narrow containers.
Step 4: Plant Placement
Before planting, arrange your plants outside the bottle to visualize the final look. Taller plants should go toward the back or center, while smaller plants sit near the front.
Make small holes in the soil using a stick or spoon. Carefully insert plants, pressing the soil gently around the roots to secure them.
Step 5: Add Moss and Decorations
Moss not only looks beautiful but also helps retain moisture. Place moss around plants or along open soil patches. You can also add small stones, driftwood, or miniature figurines for personality.
Less is more. Let the plants remain the stars.
Step 6: Light Watering
Water lightly using a spray bottle or teaspoon. The soil should be moist, not soaked. In closed bottle gardens, too much water is the most common mistake.
Step 7: Seal or Leave Open
You can leave your bottle garden open or partially closed depending on plant choice. Closed bottles create a self sustaining cycle where water evaporates, condenses, and returns to the soil.
If you see constant heavy condensation, open the container briefly to release excess moisture.
Where to Place Your Bottle Garden
Light matters, but direct sun does not. Place your bottle garden near a bright window where it receives indirect sunlight.
Avoid:
- Direct midday sun
- Heating vents
- Air conditioners
- Dark corners
A north or east facing window is often ideal.
Caring for Your Bottle Garden
Bottle gardens thrive on neglect. Overcare is their biggest enemy.
Watering tips:
- Closed bottle gardens may only need water every few months
- Open containers may need light watering every two to three weeks
- If condensation is visible daily, reduce watering
Trim plants occasionally if they touch the glass too much. Remove any yellowing leaves promptly to prevent mold.
If mold appears, open the bottle, remove affected areas, and reduce moisture.
Common Mistakes to Avoid
Even simple gardens have pitfalls. Avoid these common errors:
- Overwatering
- Using fast growing plants
- Placing in direct sunlight
- Skipping charcoal
- Crowding too many plants
Think of your bottle garden as a calm, balanced ecosystem, not a crowded jungle.
Creative Bottle Garden Ideas
Bottle gardens are a canvas for creativity.
Try:
- Herb bottle gardens for kitchen counters
- Moss only zen bottles
- Hanging bottle gardens near windows
- Themed gardens like forest floors or fairy landscapes
- Recycled wine bottle gardens
They also make thoughtful handmade gifts that last far longer than flowers.
Why Bottle Gardening Is More Than a Trend
Bottle gardens are not just decorative. They reconnect us with growth, patience, and the quiet joy of nurturing life in small doses. In a world that constantly demands more space, more speed, and more consumption, bottle gardens whisper a different philosophy.
Small can be enough. Care can be simple. Beauty can fit in your hand.
Whether you build one or ten, a bottle garden is proof that even the tightest corners can grow something alive and lovely.