Growing your own food is one of the most rewarding experiences a gardener can have. Among the many vegetables you can cultivate, pumpkins and squash stand out for their versatility, nutritional value, and long shelf life. Over the years, I have perfected a method to grow enough pumpkins and squash so that my family can enjoy them fresh, roasted, or turned into soups, pies, and casseroles throughout the year. In this article, I will share my process—from selecting seeds to storing the harvest—to help you do the same.
Choosing the Right Varieties
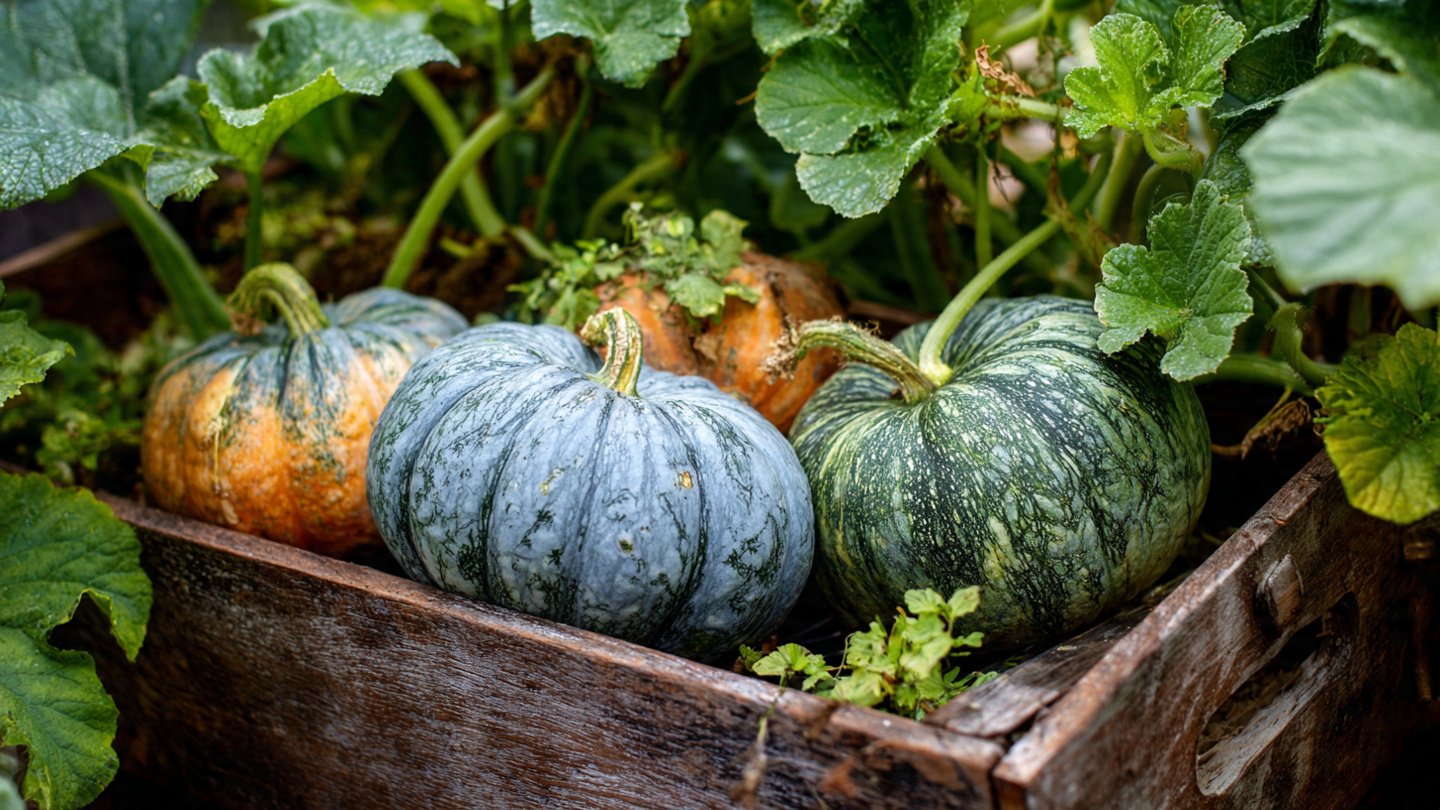
The first step in growing pumpkins and squash is selecting the right varieties. There are hundreds of types of pumpkins and squashes, each with different flavors, textures, and storage qualities. For pumpkins, I focus on long-keeping varieties such as Cinderella, Jarrahdale, and Sugar Pie. These types have thick skins that help them stay fresh for months after harvest.
For squash, I prefer a mix of summer squash and winter squash. Summer squash, like zucchini, is great for immediate consumption, while winter squash, like Butternut, Acorn, and Delicata, is perfect for long-term storage. When choosing seeds, I consider my climate, soil type, and the length of my growing season. Heirloom varieties often offer superior flavor, but hybrid seeds can provide more consistent yields and disease resistance.
Preparing the Soil
Pumpkins and squash are heavy feeders, which means they need nutrient-rich soil to thrive. I start by preparing my garden beds in early spring, well before planting. I loosen the soil and incorporate generous amounts of organic matter, such as compost and well-rotted manure. This not only improves soil fertility but also enhances drainage, which is crucial because both pumpkins and squash are prone to root rot in waterlogged soil.
I also check the soil pH. Both pumpkins and squash prefer slightly acidic to neutral soil, with a pH between 6.0 and 7.0. If necessary, I add lime to raise the pH or sulfur to lower it. Before planting, I make sure the beds are weed-free because young seedlings are particularly vulnerable to competition.
Planting and Spacing
Timing is critical when planting pumpkins and squash. These plants are frost-sensitive, so I always wait until after the last frost date in my area. I typically start seeds indoors about 3–4 weeks before transplanting them outside to give them a head start. Starting indoors also allows me to control temperature and moisture, ensuring strong, healthy seedlings.
When transplanting, I plant seedlings in hills, spacing them generously. Pumpkins can spread extensively, so I keep hills about 6–8 feet apart. For squash, spacing depends on the variety—summer squash requires around 3 feet between plants, while winter squash needs closer to 6 feet. Adequate spacing ensures good air circulation, reducing the risk of fungal diseases.
Watering and Mulching
Pumpkins and squash need consistent watering, especially during flowering and fruiting. I water deeply once or twice a week rather than shallow, frequent watering. This encourages strong root growth. Overhead watering can lead to fungal problems, so I aim to water at the base of the plants whenever possible.
Mulching is another key step. I use straw or shredded leaves around the plants to conserve moisture, regulate soil temperature, and suppress weeds. Mulching also helps keep fruits clean as they grow on the soil surface.
Fertilization
Because pumpkins and squash are heavy feeders, they require additional fertilization during the growing season. I start with a balanced fertilizer at planting time, and once the plants begin to vine and flower, I switch to a high-phosphorus fertilizer to encourage blooming and fruit development. Occasionally, I apply a side dressing of compost or organic fertilizer to provide a nutrient boost, particularly for winter squash, which grows over several months.
Pollination
Pumpkins and squash rely on pollinators, mainly bees, to produce fruit. If pollination is poor, plants may have lots of flowers but little fruit. I encourage pollinators by planting flowers nearby and avoiding insecticides during flowering. In some cases, especially if pollinators are scarce, I hand-pollinate by transferring pollen from male flowers to female flowers using a small brush. This ensures that my plants set fruit reliably.
Pest and Disease Management
Like any garden crop, pumpkins and squash are susceptible to pests and diseases. Common pests include squash bugs, vine borers, and aphids. I monitor my plants regularly, removing any pests by hand or using organic sprays like neem oil when necessary. Crop rotation is also important; I avoid planting pumpkins or squash in the same spot year after year to reduce the risk of soil-borne diseases.
Powdery mildew can be a problem, especially in humid climates. To prevent it, I maintain good spacing, avoid wetting the leaves, and remove any infected foliage promptly. Resistant varieties are also a great defense.
Harvesting
Harvesting pumpkins and squash at the right time is crucial for long-term storage. For winter squash and pumpkins, I wait until the skin is hard and cannot be punctured with a fingernail. The stems should be dry and brown. I harvest on a dry day to minimize the risk of rot. Summer squash, on the other hand, is best picked when it is tender and small, usually about 6–8 inches long.
When cutting pumpkins from the vine, I leave a few inches of stem attached. This helps prevent rot during storage. I handle the fruits carefully to avoid bruising, which can shorten their shelf life.
Curing and Storing
After harvest, I cure winter squash and pumpkins in a warm, dry location for 10–14 days. Curing helps harden the skin and heal minor cuts, extending shelf life. A temperature of around 80–85°F with good ventilation works best.
Once cured, I store pumpkins and squash in a cool, dry place—ideally around 50–55°F with 50–70% humidity. Basements, root cellars, or even a cool garage work well. With proper storage, some varieties of pumpkin and squash can last 6–12 months, allowing my family to enjoy them all year round.
Using the Harvest
Having a stockpile of pumpkins and squash transforms the way my family eats. I roast slices for side dishes, steam or puree for soups, and make pies and muffins for dessert. Winter squash can be cubed and frozen for later use, while pumpkin puree can be canned or frozen in portions. I also enjoy dehydrating slices to make pumpkin chips or grinding dried squash seeds for snacks.
This approach not only provides fresh, healthy food year-round but also saves money and reduces food waste. Knowing that my family can enjoy homegrown vegetables through winter, spring, and even early summer gives me immense satisfaction.
Tips for Success
Over the years, I’ve learned a few tips that make growing pumpkins and squash easier and more productive:
- Plan for succession planting: Planting in stages ensures a continuous harvest rather than everything ripening at once.
- Keep vines off the ground: Using straw or mulch under fruits prevents rot.
- Monitor for nutrient deficiencies: Yellowing leaves often indicate lack of nitrogen or other nutrients.
- Record your gardening year: Keeping a journal helps track which varieties perform best and when to plant next season.
- Save seeds from your best plants: This reduces seed costs and helps you select for traits that thrive in your local conditions.
Conclusion
Growing pumpkins and squash for year-round consumption is both practical and deeply satisfying. With careful planning, proper soil preparation, consistent care, and attention to storage, you can provide your family with a steady supply of these nutritious and versatile vegetables. Beyond the food itself, the process connects you to the rhythms of the seasons and fosters a sense of self-reliance that is rare in today’s fast-paced world.
Whether you’re a beginner gardener or an experienced grower, I encourage you to try your hand at pumpkins and squash. The effort you put into nurturing these plants is richly rewarded with vibrant flavors, nourishing meals, and the pride of feeding your family with the fruits of your own labor.