Sweetsop, also known as Sitaphal, sugar apple, or custard apple, is a tropical fruit cherished for its creamy, sweet flesh and distinctive flavor. Known for its nutritional benefits, including high fiber, vitamin C, and antioxidants, the Sweetsop is a delight for fruit lovers. While it grows naturally in tropical climates, you can successfully grow this delicious fruit at home with patience, care, and the right guidance. In this complete step-by-step guide, we’ll walk you through growing Sweetsop from seed to harvest, ensuring a fruitful experience in your home garden.
Why Grow Sweetsop at Home?
Growing Sweetsop at home has multiple advantages:
- Fresh, Organic Fruit: Homegrown Sweetsop is free from chemicals and pesticides often used in commercial orchards.
- Nutritional Benefits: The fruit supports digestion, boosts immunity, and provides essential nutrients.
- Aromatic and Attractive Tree: The lush green foliage and unique fruit make it a beautiful addition to your garden or backyard.
- Educational and Rewarding: Watching a Sweetsop tree grow from a tiny seed to a fruit-bearing tree is a fulfilling experience, perfect for teaching children about nature and gardening.
Although the Sweetsop tree requires patience, the long-term benefits of homegrown fruit make it worthwhile.
Step 1: Selecting the Right Seeds
The first step to a healthy Sweetsop tree is choosing quality seeds. You have two main options:
- Seeds from Fresh Fruit: Choose a ripe, healthy Sweetsop fruit. Extract the seeds, wash them gently, and allow them to air-dry for a day or two. Avoid over-drying as it reduces germination rates.
- Seeds from Trusted Sources: If fresh fruit is unavailable, purchase seeds from reputable nurseries or online sources to ensure high germination and disease-free plants.
When selecting seeds, always choose large, plump seeds, as they generally have better viability.
Step 2: Preparing Seeds for Germination
Sweetsop seeds need proper preparation for successful germination:
- Soak the Seeds: Place seeds in clean water for 24–48 hours. This softens the hard seed coat, speeding up germination.
- Optional Scarification: Gently nick the seed coat with a small knife to help water penetrate. Be careful not to damage the inner seed.
- Germination Medium: Use a mix of sand, compost, and garden soil in a small seed tray or pot. The medium should be well-draining and loose.
Once prepared, sow the seeds about 1–2 cm deep and cover lightly with soil. Keep the soil moist but not soggy.
Step 3: Germination and Seedling Care
Sweetsop seeds usually germinate within 2–4 weeks, depending on temperature and seed quality. During this period:
- Maintain Warmth: Keep the seed tray in a warm location, ideally between 25–30°C (77–86°F).
- Consistent Moisture: Mist the soil daily or water gently to maintain even moisture. Avoid waterlogging, which can cause seeds to rot.
- Sunlight: Once seedlings emerge, ensure they receive indirect sunlight for 4–6 hours a day. Avoid harsh midday sun that can scorch tender seedlings.
Once seedlings develop 2–3 sets of true leaves, they are ready to be transplanted into individual pots or larger containers.
Step 4: Transplanting Seedlings
Transplanting is crucial for establishing strong roots and ensuring healthy growth:
- Choose a Container or Spot: Initially, a 10–15 liter pot works well. Later, the tree can be moved to a larger container or directly to the garden.
- Soil Preparation: Use a mixture of garden soil, compost, and sand. The soil should be fertile and well-draining to support growth.
- Planting Depth: Place the seedling so that the base of its stem is level with the soil surface. Firm the soil gently around the roots.
- Watering: Water immediately after transplanting to reduce transplant shock and settle the soil around roots.
For outdoor planting, choose a location with partial to full sunlight and protection from strong winds.
Step 5: Watering and Fertilization
Sweetsop trees thrive with consistent care:
- Watering: Young trees need regular watering to establish roots, ideally 2–3 times per week. Mature trees are more drought-tolerant but benefit from occasional deep watering, especially during flowering and fruiting.
- Fertilization: Feed your tree every 2–3 months with organic compost or a balanced NPK fertilizer. Incorporate additional potassium during fruiting to enhance size and sweetness.
- Mulching: Apply a layer of mulch around the base to retain moisture, suppress weeds, and regulate soil temperature.
Proper nutrition ensures healthy foliage, robust growth, and abundant fruit.
Step 6: Pruning and Training
Pruning helps maintain tree shape and encourages better fruit production:
- Initial Pruning: Trim young seedlings to encourage strong branching. Remove weak or damaged stems.
- Shaping the Tree: Once the tree grows taller, select 3–5 main branches as the framework. Remove crossing branches to allow sunlight penetration.
- Regular Maintenance: Prune dead or diseased branches each season. This improves airflow, reducing the risk of pests and fungal infections.
A well-pruned Sweetsop tree will have a strong structure, making it easier to manage fruiting branches.
Step 7: Flowering and Pollination
Sweetsop trees typically begin flowering 3–5 years after planting from seed. Flowers are small, greenish-yellow, and appear along the branches.
- Pollination: Insect pollinators, like bees, naturally pollinate Sweetsop flowers. However, hand-pollination can improve fruit set, especially in areas with few pollinators. Use a soft brush to transfer pollen from male to female flowers.
- Flower Care: Avoid overwatering during flowering, as waterlogged soil can reduce fruit formation.
Successful pollination leads to small green fruits that gradually mature into the sweet, segmented Sweetsop we love.
Step 8: Fruit Development and Harvesting
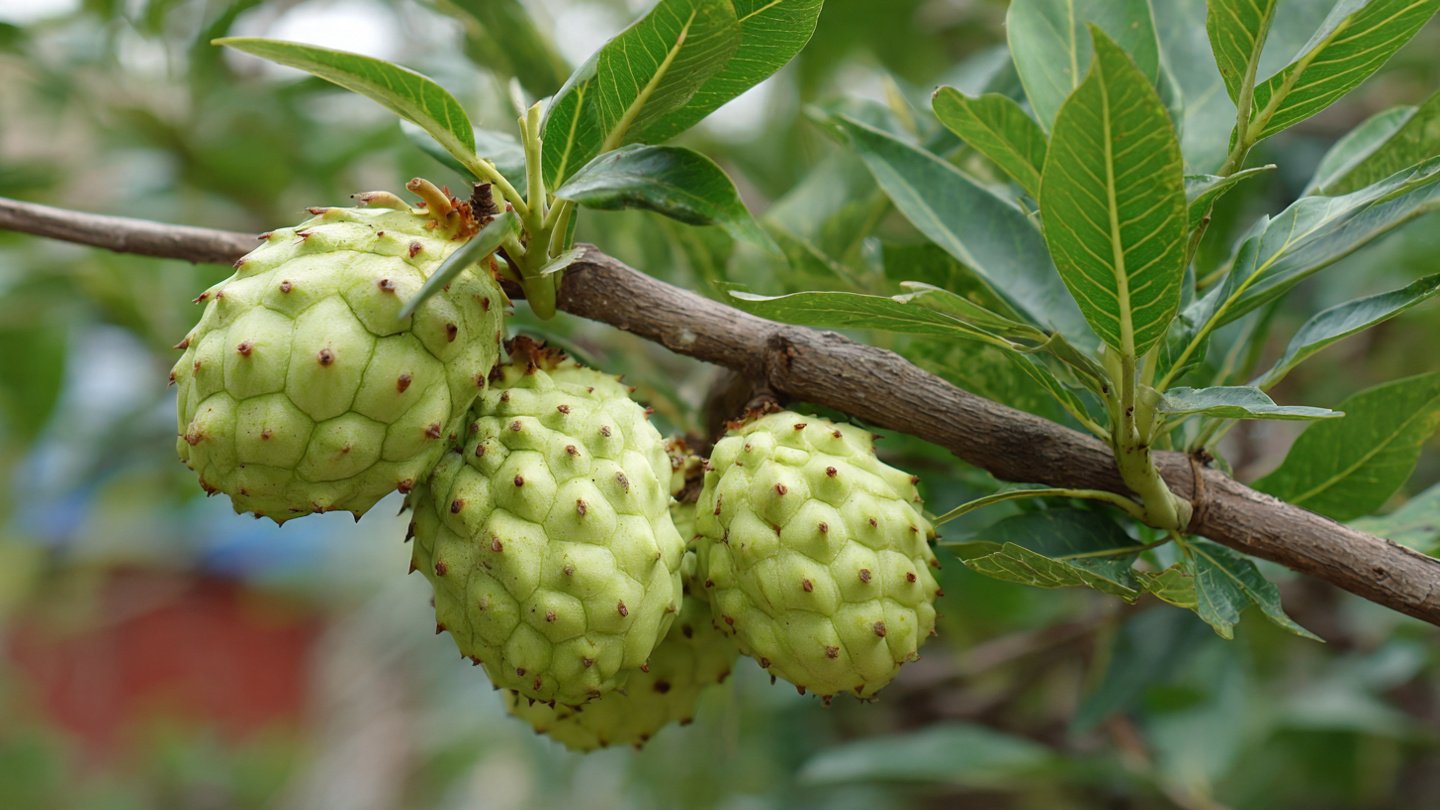
Sweetsop fruit grows in clusters along branches and typically takes 3–4 months to mature after flowering:
- Maturation: The fruit changes color slightly, becoming lighter green with a soft, bumpy exterior. Gentle pressure should reveal slight softness when ripe.
- Harvesting: Cut the fruit from the branch using a sharp knife or scissors. Avoid pulling by hand to prevent branch damage.
- Storage: Sweetsop is best consumed fresh, although it can be refrigerated for a few days.
Regular harvesting encourages the tree to produce more fruits in subsequent seasons.
Common Challenges and Solutions
Growing Sweetsop at home comes with some challenges:
- Pests: Aphids, mealybugs, and fruit borers may attack. Use neem oil or organic pesticides to control infestations.
- Diseases: Fungal infections like anthracnose can occur in humid climates. Ensure proper pruning, spacing, and airflow to reduce risks.
- Slow Growth: Seed-grown trees may take several years to fruit. Grafting onto mature rootstocks can shorten the waiting period.
- Nutrient Deficiency: Yellow leaves indicate a lack of nitrogen. Supplement with compost or balanced fertilizer.
With careful attention, most issues can be managed naturally without harming the tree.
Benefits of Growing Sweetsop at Home
Beyond delicious fruit, growing Sweetsop trees at home offers several advantages:
- Health Benefits: High in fiber, vitamins, and antioxidants, Sweetsop promotes digestion, boosts immunity, and supports overall wellness.
- Cost Savings: Growing your own fruit reduces grocery expenses.
- Environmental Impact: Planting trees contributes to a greener environment, reduces carbon footprint, and supports biodiversity.
- Aesthetic Appeal: The tree’s lush foliage and unique fruits add beauty to any garden or backyard.
Homegrown Sweetsop also encourages sustainable living and can become a conversation starter among neighbors and friends.
Conclusion
Growing Sweetsop (Sitaphal) at home is a rewarding journey that takes patience, care, and dedication. From selecting the right seeds to nurturing seedlings, managing growth, and finally harvesting sweet, creamy fruits, each step brings satisfaction and joy. While it may take several years to enjoy the first fruits from seed-grown trees, the experience of cultivating your own Sweetsop is unmatched.
By following this step-by-step guide, you can transform your garden or backyard into a thriving oasis of tropical goodness. Not only will you enjoy fresh, organic Sweetsop, but you’ll also contribute to a greener environment and inspire sustainable gardening practices in your community.
Whether you’re a seasoned gardener or a beginner, growing Sweetsop at home is a fulfilling project that combines patience, nature, and the pure delight of homegrown fruit. Start today, and watch your Sweetsop tree grow from a tiny seed into a bountiful treasure, ready to reward your care with its sweet, succulent harvest.