Chickpeas, also known as garbanzo beans, are nutrient-rich legumes prized for their versatility in dishes like hummus, stews, and salads. Growing them in a small garden pot may seem ambitious, but with the right approach, it’s entirely possible to cultivate healthy, productive plants right on your balcony, patio, or kitchen windowsill. This guide will walk you through the complete journey from seed to harvest, providing practical tips for a successful chickpea-growing experience.
Why Grow Chickpeas at Home?
Chickpeas are packed with protein, fiber, vitamins, and minerals, making them a staple in vegetarian and vegan diets. By growing them at home, you gain control over the quality of your produce, reduce your grocery bills, and enjoy the satisfaction of harvesting your own food. Even in limited spaces, container gardening allows you to cultivate chickpeas with minimal effort while still achieving impressive yields.
Choosing the Right Chickpea Variety
There are two main types of chickpeas: Desi and Kabuli. Desi chickpeas are smaller, darker, and have a rough coat, while Kabuli varieties are larger, cream-colored, and smoother. For container gardening, Kabuli types are often preferred because they grow taller and produce larger seeds, making harvesting easier. Choose certified seeds from a reputable supplier to ensure high germination rates and disease-free plants.
Selecting the Perfect Container
Chickpeas have a deep taproot system, so selecting a pot that accommodates their roots is essential. A container with a depth of 12-14 inches (30-35 cm) and a diameter of at least 12 inches (30 cm) is ideal for one or two plants. Ensure your pot has drainage holes at the bottom to prevent waterlogging, which can cause root rot and other fungal issues.
Tip: Terracotta pots are excellent because they allow air circulation and help prevent excess moisture, but any sturdy container with proper drainage will work.
Preparing the Soil
Chickpeas thrive in well-draining, loamy soil with a slightly acidic to neutral pH (6.0–7.0). You can prepare an ideal potting mix by combining:
- 2 parts garden soil or compost
- 1 part perlite or coarse sand
- 1 part organic compost
Adding compost ensures the soil is nutrient-rich, while sand or perlite improves drainage. Avoid heavy clay soils that retain water, as chickpeas are prone to root rot in soggy conditions.
Seed Preparation and Sowing
Before planting, soak the chickpea seeds in water for 8-12 hours. Soaking softens the seed coat, encourages faster germination, and reduces the risk of soil-borne diseases. After soaking:
- Fill your pot with prepared soil, leaving about 1 inch (2.5 cm) from the top.
- Plant seeds 1–2 inches (2.5–5 cm) deep, spacing them about 3–4 inches (7–10 cm) apart if planting multiple seeds in a larger pot.
- Gently water the soil to keep it evenly moist, but not soggy.
Germination usually occurs within 7–10 days if the soil is kept warm (around 70°F or 21°C).
Providing Adequate Light
Chickpeas are sun-loving plants and require 6–8 hours of direct sunlight daily. If growing indoors, place the pot on a sunny windowsill or supplement with a grow light for optimal growth. Insufficient light can result in weak, leggy plants with reduced yields.
Watering and Maintenance
Chickpeas prefer moderate watering. Overwatering can cause fungal diseases, while underwatering can stunt growth and reduce pod formation. A good rule of thumb is to water when the top inch (2.5 cm) of soil feels dry. Ensure water drains freely from the pot to prevent standing water.
Regular maintenance also includes:
- Weeding: Remove any competing weeds from the pot.
- Mulching: A thin layer of organic mulch, like straw or shredded leaves, helps retain soil moisture and regulate temperature.
- Support: As chickpeas grow taller, their stems may require gentle staking to prevent bending or breaking.
Fertilization
Chickpeas are legumes, which naturally fix nitrogen from the air, reducing their dependence on synthetic fertilizers. However, providing some nutrients can boost growth:
- Compost or well-rotted manure at planting time provides slow-release nutrients.
- Liquid seaweed or fish emulsion every 3–4 weeks encourages strong foliage and healthy pods.
Avoid over-fertilizing with nitrogen-rich fertilizers, as excessive nitrogen encourages leaf growth at the expense of flowers and pods.
Flowering and Pollination
Chickpeas usually flower 6–8 weeks after germination. The small, delicate flowers are typically self-pollinating, but gentle hand-pollination using a soft brush can increase pod set, especially indoors where pollinators are absent. Healthy flowers indicate that your plants are ready to transition into the pod-filling stage.
Pest and Disease Management
Growing chickpeas in containers reduces the risk of many soil-borne pests, but it’s important to monitor for:
- Aphids: Small, soft-bodied insects that cluster on leaves. Spray with mild insecticidal soap if detected.
- Powdery mildew: White, powdery growth on leaves. Improve air circulation and avoid overhead watering.
- Root rot: Caused by waterlogged soil. Ensure proper drainage and avoid excessive watering.
Regular inspection and early intervention are key to preventing infestations and ensuring a healthy harvest.
Harvesting Chickpeas
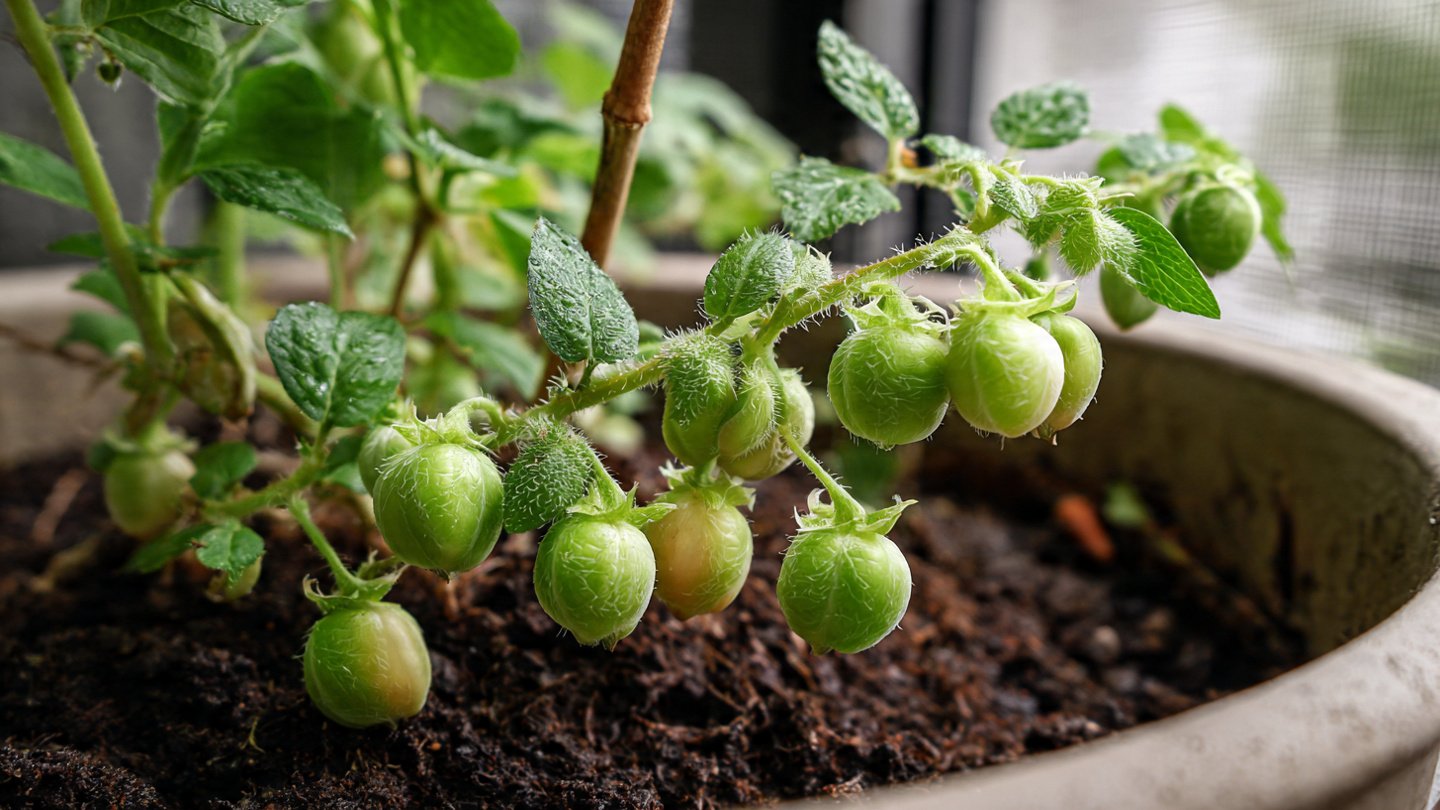
Chickpeas can be harvested green or dry, depending on your preference:
- Green chickpeas: Pick when the pods are plump and green, usually 3–4 months after sowing. They are tender and ideal for fresh cooking or snacking.
- Dry chickpeas: Allow pods to mature and dry on the plant. The pods will turn brown and brittle. Harvesting dry chickpeas ensures a long shelf life and is suitable for storage or making flour.
To harvest, gently pull the pods from the plant. For dry chickpeas, remove seeds from the pods and store them in a cool, dry place.
Tips for Maximizing Container Yield
Even in a small pot, you can boost chickpea production with a few strategies:
- Plant multiple pots: Stagger planting dates to ensure continuous harvests.
- Rotate crops: Avoid planting chickpeas in the same soil consecutively to reduce disease risk.
- Sunlight optimization: Rotate pots periodically to ensure all sides of the plant receive adequate sunlight.
- Regular pruning: Trim excessive foliage to direct energy toward pod development.
Common Mistakes to Avoid
- Planting too deep or too shallow: This can hinder germination. Stick to 1–2 inches depth.
- Overcrowding: Each plant needs space to grow. Overcrowding reduces airflow and increases disease risk.
- Ignoring drainage: A pot without proper drainage is a recipe for root rot.
- Neglecting sunlight: Chickpeas in shade will be weak and produce fewer pods.
By avoiding these mistakes, you can enjoy a bountiful container harvest.
Conclusion
Growing chickpeas in a simple garden pot is a rewarding experience that transforms a small space into a productive mini-garden. From careful seed selection and soil preparation to attentive watering, sunlight, and harvesting, every step contributes to healthy, flavorful chickpeas. Whether you enjoy them fresh, cooked, or dried, homegrown chickpeas offer the satisfaction of nurturing a plant from seed to table. With patience, care, and a bit of trial and error, you can enjoy this versatile legume right at your fingertips—proving that even small spaces can yield big rewards.