Mint is one of the most versatile and easy-to-grow herbs. Its refreshing aroma and flavor make it perfect for teas, desserts, salads, and cocktails. Traditionally, mint grows well in garden beds, but not everyone has outdoor space. The good news is you can grow mint in recycled plastic bottles, creating a compact, eco-friendly, and highly productive herb garden right at home. This guide provides a step-by-step approach to growing mint in a plastic bottle, from preparation to harvest, making it accessible for beginners and seasoned gardeners alike.
Why Grow Mint in a Plastic Bottle?
Plastic bottles are more than just waste—they are excellent mini-greenhouses for herbs. Growing mint in a bottle has several advantages:
- Space-Saving: Vertical or hanging bottle gardens are ideal for apartments, balconies, or small kitchens.
- Eco-Friendly: Repurposing plastic bottles reduces waste and promotes sustainable gardening.
- Controlled Growth: Bottles allow easy management of soil, water, and light conditions.
- Mobility: You can move the bottle garden to adjust sunlight exposure or bring it indoors during harsh weather.
- Beginner-Friendly: With minimal materials and space, anyone can grow fresh mint without a traditional garden.
Materials You Will Need
Before starting, gather these simple materials:
- A clean plastic bottle (1–2 liters work best)
- Sharp scissors or a craft knife
- Potting soil (well-draining mix)
- Small stones or gravel (for drainage)
- Mint cuttings or seeds
- Watering can or spray bottle
- Optional: string or hooks for hanging bottles
Having these materials ready ensures a smooth and efficient planting process.
Step 1: Preparing the Bottle
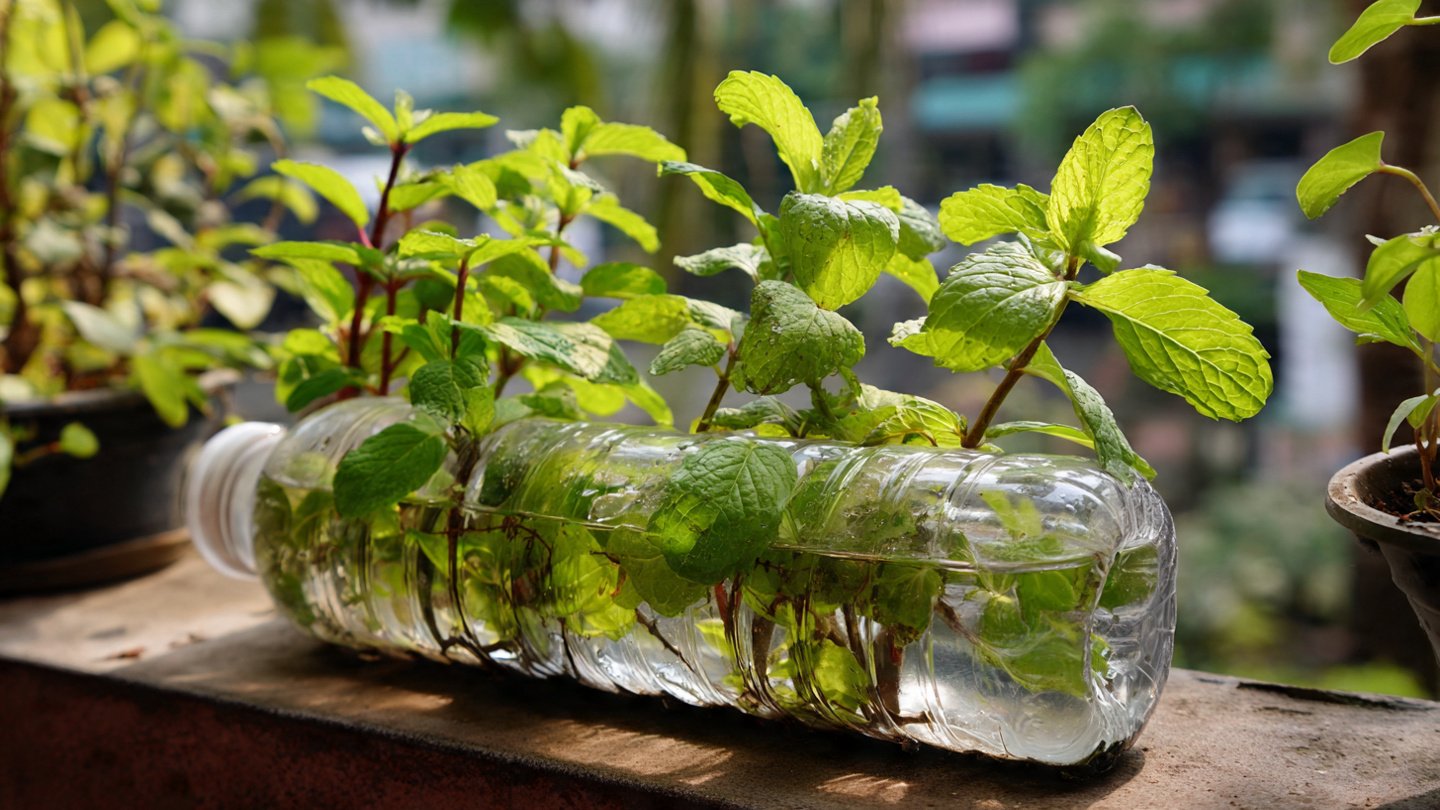
- Cut the Bottle: Using scissors or a craft knife, cut the top portion of the bottle to create an opening large enough to plant and water your mint. You can also cut the bottle horizontally into two parts and invert the top section to form a mini self-watering planter.
- Create Drainage Holes: Punch 3–5 small holes at the bottom of the bottle to prevent waterlogging, which can cause root rot.
- Optional Hanging Setup: If you want a vertical or hanging herb garden, punch two holes near the top and thread a string through them to suspend the bottle.
Proper preparation of the bottle sets the foundation for healthy, thriving mint plants.
Step 2: Choosing and Preparing Mint
You can grow mint from seeds or cuttings. Each method has advantages:
- Seeds: Provide variety and are inexpensive but take longer to germinate.
- Cuttings: Quicker growth, often root within 1–2 weeks, and are true to the parent plant’s flavor.
For cuttings:
- Select a healthy mint stem with 3–4 nodes.
- Remove the lower leaves, leaving 2–3 sets of leaves at the top.
- Place the cutting in water until roots develop, typically 7–14 days.
For seeds:
- Lightly moisten potting soil.
- Sprinkle seeds evenly on the surface.
- Cover lightly with soil and mist with water.
Both methods are effective; beginners may find cuttings easier and faster to start with.
Step 3: Planting the Mint
- Layer the Bottle Base: Add 1–2 inches of small stones or gravel for drainage.
- Add Potting Soil: Fill the bottle with well-draining potting mix, leaving a small space at the top for watering.
- Plant the Mint: Insert the rooted cutting or gently press seeds into the soil. If using seeds, cover lightly with soil.
- Firm the Soil: Gently press around the plant to remove air pockets and stabilize the mint.
Water the soil thoroughly but avoid overwatering. The soil should be moist, not soggy.
Step 4: Placement and Sunlight
Mint grows best in partial to full sunlight. Place your bottle garden in a location that receives at least 4–6 hours of indirect or filtered sunlight daily. Direct sunlight for prolonged periods may scorch the leaves, while too little light can cause weak, leggy growth.
For indoor setups, consider a south-facing window or use an artificial grow light if natural sunlight is insufficient. Rotating the bottle regularly ensures even growth on all sides.
Step 5: Watering and Care
Mint in a plastic bottle requires regular attention to moisture:
- Watering Frequency: Check the soil daily; water when the top inch feels dry.
- Avoid Overwatering: Excess water can drown roots and lead to fungal issues. Ensure drainage holes remain unblocked.
- Humidity: Mist leaves occasionally to mimic natural humidity, especially indoors.
Fertilization:
- Mint grows quickly and benefits from light feeding.
- Use liquid or water-soluble fertilizer every 2–3 weeks during the growing season.
- Avoid overfertilization, which can reduce flavor intensity.
Pruning and Harvesting:
- Regular pruning encourages bushier growth and prevents mint from becoming leggy.
- Harvest leaves from the top, cutting just above a node. This promotes branching and continuous leaf production.
- For maximum flavor, harvest in the morning when essential oils are most concentrated.
Step 6: Preventing Common Issues
Even small bottle gardens can face challenges. Here’s how to avoid common problems:
- Yellowing Leaves: Often caused by overwatering or poor drainage. Ensure soil drains well and water only when needed.
- Leggy Growth: Insufficient light can cause thin stems. Move the bottle to a sunnier spot or use a grow light.
- Pests: Aphids or spider mites may appear. Spray leaves with mild soapy water or neem oil to control infestations.
- Fungal Issues: Remove dead or damaged leaves promptly, and ensure proper air circulation around the bottle.
Regular monitoring ensures your mint remains healthy and productive.
Step 7: Expanding Your Bottle Herb Garden
Once you’ve successfully grown mint in a single bottle, consider expanding your vertical garden:
- Hanging Bottle Gardens: Suspend multiple bottles in a vertical arrangement to grow mint alongside other herbs like basil, oregano, or cilantro.
- Stacked Planters: Cut larger bottles into tiers, stacking them for a cascading herb garden.
- Window Herb Shelf: Place a row of bottle planters on a windowsill for convenient access and efficient use of space.
This modular approach allows you to cultivate a variety of herbs in small urban spaces while maintaining beauty and functionality.
Benefits of Growing Mint in Bottles
Growing mint in plastic bottles offers multiple advantages:
- Sustainability: Reuses plastic bottles, reducing waste.
- Convenience: Fresh mint is always available at home.
- Cost-Effective: Minimal investment in materials and seeds/cuttings.
- Aesthetic Appeal: Green plants in recycled bottles add charm to kitchens, balconies, or patios.
- Educational: Ideal for teaching children about gardening, plant growth, and sustainability.
Conclusion
Growing mint in a plastic bottle is a simple, safe, and rewarding way to cultivate fresh herbs at home. With minimal materials, space, and care, you can create a thriving mini-garden that yields flavorful mint leaves year-round. From selecting a healthy cutting or seed to preparing the bottle, planting, and maintaining the herb, every step is straightforward and beginner-friendly.
This method also highlights sustainability, repurposing plastic waste while adding beauty and functionality to your home. By following these steps, you can enjoy a continuous supply of mint for teas, cooking, garnishes, and more—all from a humble plastic bottle.
Whether you’re an urban gardener, beginner, or herb enthusiast, “from bottle to bounty” is more than a clever idea—it’s a practical approach that combines creativity, sustainability, and productivity. Your small plastic bottle garden can transform into a lush green retreat that rewards you with flavor, fragrance, and pride in your gardening skills.
So, start today: grab a plastic bottle, some soil, and a mint cutting, and watch your homegrown mint flourish right before your eyes!