Watering plants efficiently is a key factor in healthy growth, higher yields, and conserving water. Traditional watering methods, like overhead sprinklers or hand-watering, can be wasteful, uneven, and time-consuming. Drip irrigation solves these problems by delivering water directly to plant roots at a slow, consistent rate. While commercial drip irrigation systems are available, creating your own DIY drip emitters can save money, reduce waste, and be customized to fit your garden’s needs.
This guide provides a step-by-step approach to building your own drip irrigation system, from understanding the basics to constructing effective drip emitters for pots, raised beds, and in-ground plants.
Why Use Drip Irrigation?
Drip irrigation is one of the most efficient ways to water plants. Its benefits include:
- Water Conservation: Drip irrigation uses up to 50% less water than overhead watering.
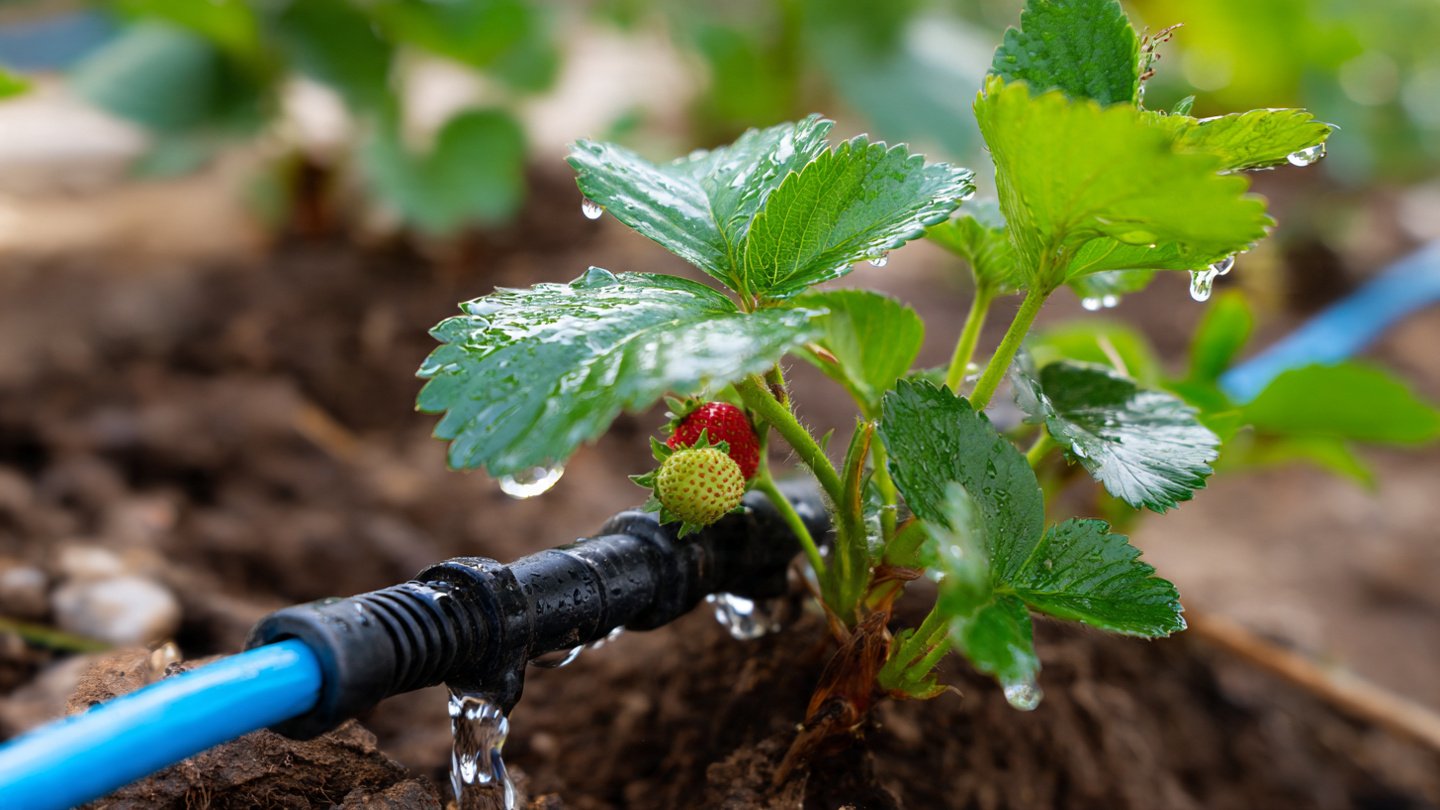
- Targeted Delivery: Water goes directly to the root zone where it’s needed most.
- Healthier Plants: Reduces the risk of fungal diseases by keeping leaves dry.
- Time-Saving: Once installed, it reduces the need for daily watering.
- Customizable: Easy to adjust flow rates for different plants.
DIY drip systems can be adapted for small container gardens, vegetable beds, or larger landscapes, making them versatile for any gardener.
Step 1: Understanding Drip Emitters
A drip emitter is the component that releases water slowly at the plant’s roots. Understanding the types and flow rates is essential:
- Pre-made Emitters: Commercial emitters are available in 1–4 gallons per hour (GPH). They are convenient but less flexible.
- DIY Emitters: Simple DIY versions can be made from tubing, bottles, or even clay spikes. They are inexpensive and customizable.
The goal is to deliver consistent water without oversaturating the soil. Each plant’s water needs differ based on species, soil type, and container size, so DIY emitters allow precise control.
Step 2: Materials Needed for DIY Drip Emitters
You don’t need specialized equipment to create your own drip irrigation system. Common materials include:
- Plastic tubing: ¼-inch or ½-inch garden tubing works well.
- Small containers or bottles: 500 mL or 1 L bottles are perfect for slow release.
- Drill or pin: To make tiny holes for water flow.
- Stakes or clips: To secure tubing or bottles near plant roots.
- Optional connectors: T-joints or end caps for more complex setups.
Depending on your approach, you can make inline drip emitters, bottle-based drip systems, or even clay spike systems that gradually release water.
Step 3: Planning Your Drip System
Before building, plan your irrigation layout:
- Identify Plant Locations: Mark each plant that needs water.
- Determine Water Needs: Consider plant type, soil type, and sun exposure.
- Select the Appropriate Flow Rate: Heavier feeders need faster water flow.
- Decide on a DIY Emitter Type: Bottle-based drip is ideal for small container gardens; tubing emitters work well for raised beds.
- Measure Tubing Lengths: Ensure you have enough tubing to reach all plants without kinks or sharp bends.
Planning saves time, prevents mistakes, and ensures uniform watering for all your plants.
Step 4: Creating Bottle-Based Drip Emitters
One of the simplest DIY methods is to convert bottles into slow-release drip systems:
Materials Needed:
- Empty plastic bottle
- Nail or pin for holes
- Small stake to secure bottle
- Water
Steps:
- Clean the bottle thoroughly.
- Using a pin or small nail, make 2–4 tiny holes near the bottle cap. Larger holes release water faster; smaller holes are slower.
- Fill the bottle with water.
- Invert the bottle and place it near the plant’s base.
- Secure the bottle with a stake if necessary.
Tip: Adjust hole size or add multiple holes for heavier or larger plants. Test the flow rate and modify as needed.
Step 5: Making Tubing-Based Drip Emitters
Tubing-based systems are ideal for garden beds and container setups:
Materials Needed:
- ¼-inch or ½-inch polyethylene tubing
- Stakes to hold tubing near plants
- Pin or needle to puncture tubing
- End caps for tubing
Steps:
- Cut tubing to fit your garden layout.
- Punch small holes along the tubing, spacing them according to plant size and water requirements.
- Insert tubing near the plant roots and secure with stakes.
- Connect the tubing to a water source or larger supply line.
- Cap the ends to maintain pressure.
Tip: Start with small holes. You can enlarge them if the flow rate is too slow. Consistent drip placement ensures all plants receive water.
Step 6: Clay Spike or Terracotta Drip Emitters
For a sustainable and decorative solution, clay spikes work beautifully:
Materials Needed:
- Small clay pots or spikes
- Tubing or water-filled bottles
- Soil to embed the spike
Steps:
- Fill the clay spike with water.
- Insert the spike into the soil near the plant’s root zone.
- The porous clay allows water to slowly seep into the soil.
- Refill as needed.
Tip: Clay spike emitters are perfect for potted plants or small raised beds where water conservation is critical.
Step 7: Testing and Adjusting the System
Once your DIY emitters are installed:
- Test Flow Rate: Turn on the water and check each emitter.
- Adjust Holes or Flow: If water is too fast, make smaller holes or reduce pressure. If too slow, enlarge holes or add more.
- Check Distribution: Make sure all plants receive adequate water without pooling.
- Observe Soil Moisture: Soil should be moist 2–4 inches deep.
Regular monitoring ensures plants thrive and water is not wasted.
Step 8: Maintaining Your DIY Drip Irrigation
Maintenance is key to keeping your system effective:
- Clean Emitters Regularly: Remove debris or mineral deposits that block holes.
- Check Tubing for Leaks: Repair holes or replace damaged sections.
- Adjust for Plant Growth: As plants grow, adjust emitter placement or flow rate.
- Seasonal Adjustment: Reduce water frequency in cooler months and increase during hot, dry periods.
Proper maintenance prevents uneven watering and keeps plants healthy.
Step 9: Benefits of DIY Drip Emitters
Creating your own drip emitters has several advantages:
- Cost-Effective: Uses recycled bottles and basic materials.
- Customizable: Adjust flow rate and emitter placement to suit each plant.
- Sustainable: Reduces water waste and conserves resources.
- Low Maintenance: Once set up, drip systems require minimal effort.
- Scalable: Works for indoor gardens, container gardens, raised beds, and even small landscapes.
DIY emitters are an eco-friendly and practical solution for gardeners of all experience levels.
Step 10: Expert Tips for Thriving Plants
- Mulch Around Plants: Helps retain moisture and reduce evaporation.
- Use Gravity or Low Pressure: Excessive water pressure can cause emitters to fail.
- Group Plants by Water Needs: Plants with similar requirements should share emitters.
- Test New Materials: Plastic bottles or clay spikes vary, so test before large-scale installation.
- Regularly Inspect System: Detect leaks or blockages early for consistent watering.
Following these tips ensures your DIY drip irrigation system keeps plants thriving with minimal effort.
Conclusion
DIY drip irrigation is a simple, affordable, and efficient way to keep plants healthy while conserving water. Whether you use bottle-based drip emitters, tubing systems, or clay spikes, you can create a customized solution for container gardens, raised beds, or in-ground plants.
By understanding plant water needs, planning your layout, and carefully constructing your emitters, you can deliver consistent, targeted moisture to roots, reduce water waste, and save time. Regular testing, maintenance, and adjustment ensure your plants thrive year-round.
With this guide, even beginners can set up an effective DIY drip irrigation system that supports robust growth, higher yields, and healthier plants, all while minimizing effort and maximizing efficiency.