Salad greens are a cornerstone of a healthy diet, offering vitamins, minerals, and a refreshing crunch. From tender lettuce leaves to peppery arugula and nutrient-packed spinach, a homegrown salad mix can elevate your meals while ensuring freshness and safety. Growing salad greens at home is surprisingly easy, even if you have limited space or are new to gardening. With the right guidance, you can enjoy continuous harvests of crisp, vibrant greens year-round. This guide provides a detailed, step-by-step approach to cultivating lush salad mix greens at home.
Why Grow Your Own Salad Greens?
Before we dive into the process, it’s worth understanding the benefits of homegrown salad greens:
- Freshness and Flavor: Homegrown greens are picked at their peak, delivering unparalleled taste.
- Nutritional Value: Freshly harvested greens retain more vitamins and minerals compared to store-bought options.
- Cost-Effective: Growing your own salad mix can save money over time, especially if consumed frequently.
- Chemical-Free: You control what goes into your soil and water, avoiding pesticides and preservatives.
- Year-Round Harvest: With proper planning, salad greens can be grown indoors or in containers, providing a continuous supply.
Homegrown salad greens also allow you to experiment with different textures, flavors, and colors, creating vibrant and nutritious salads.
Step 1: Choose the Right Greens
Salad mix usually includes a variety of leafy vegetables that complement each other in taste, texture, and appearance. Some popular options include:
- Lettuce Varieties: Loose-leaf, romaine, butterhead
- Spinach: Smooth or savoyed leaves
- Arugula: Peppery, flavorful leaves
- Mustard Greens: Slightly spicy for added depth
- Baby Kale: Mild, tender leaves
- Chard: Adds color and texture
When selecting seeds, look for fast-growing, disease-resistant varieties labeled for salad mixes. You can also create your own custom blend by combining seeds for different flavors and leaf shapes.
Step 2: Choose a Planting Container or Bed
Salad greens are adaptable and can thrive in containers, raised beds, or even small balcony gardens.
- Containers: Use pots or trays with a depth of at least 6–8 inches. Ensure drainage holes to prevent waterlogging.
- Raised Beds: Offer better drainage, soil quality control, and ease of access.
- Indoor Options: Window boxes or shallow trays work well with supplemental lighting.
The key is to provide enough space for roots to grow while keeping the planting dense enough for a lush mix.
Step 3: Select and Prepare the Soil
Salad greens thrive in nutrient-rich, well-draining soil:
- Soil Type: A light, loamy soil works best.
- pH Level: Aim for slightly acidic to neutral soil (pH 6–7).
- Amendments: Incorporate compost or organic fertilizer to enrich the soil and improve texture.
- Preparation: Remove weeds, rocks, and debris. Loosen the soil for better root penetration.
Healthy soil ensures vigorous growth, crisp leaves, and minimal stress for your plants.
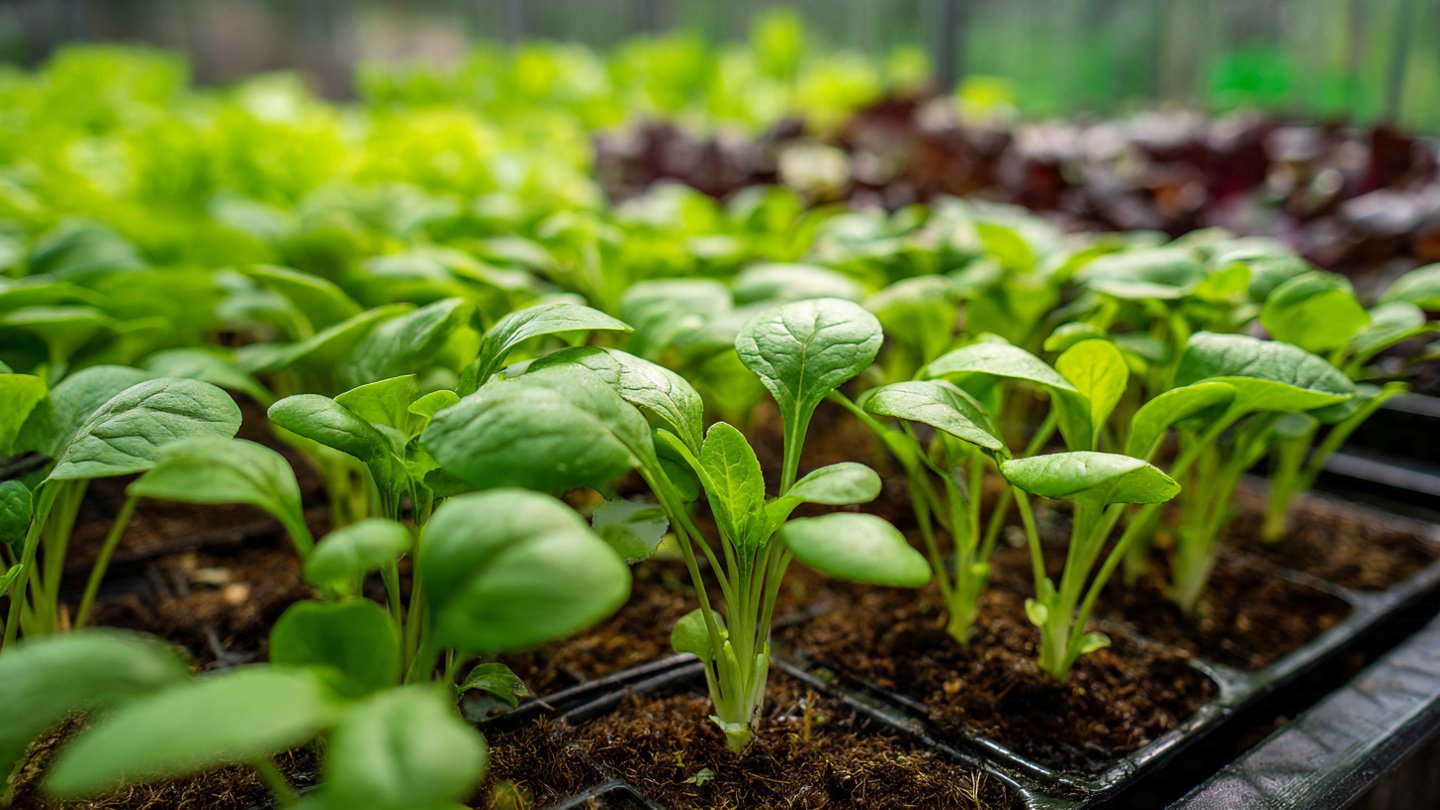
Step 4: Plant the Seeds
Planting seeds properly is critical for uniform growth:
- Sowing Depth: Most salad greens can be sown shallowly, about ¼–½ inch deep.
- Spacing: For a dense salad mix, sow seeds slightly closer together; you can thin seedlings later.
- Mixing Seeds: If planting a mix, scatter different seeds evenly across the container or bed.
- Labeling: Use markers to remember which greens are planted where, especially if varieties differ.
Water gently after sowing to keep the soil moist but not waterlogged.
Step 5: Provide Proper Light and Temperature
Light and temperature are crucial for healthy salad greens:
- Light Requirements: Greens need 4–6 hours of sunlight daily. If growing indoors, use full-spectrum LED grow lights for 12–16 hours per day.
- Temperature: Most salad greens prefer cooler temperatures (60–70°F or 15–21°C). Avoid extreme heat, which can cause bolting (premature flowering).
- Air Circulation: Ensure good airflow to prevent fungal diseases and promote strong growth.
Monitoring these factors helps your greens develop tender, vibrant leaves without stress.
Step 6: Watering and Moisture Management
Consistent moisture is key for lush greens:
- Frequency: Water regularly to keep soil consistently moist but not soggy.
- Method: Use a fine mist or drip watering to avoid dislodging seeds or compacting soil.
- Mulching: Apply a thin layer of organic mulch to retain moisture and reduce soil temperature fluctuations.
Overwatering or allowing soil to dry out can stunt growth or cause bitterness in the leaves.
Step 7: Thinning and Maintenance
Once seedlings emerge, thin them for better air circulation and leaf development:
- Thinning: Remove weaker seedlings to allow stronger plants adequate space (2–4 inches apart for young leaves).
- Weeding: Keep the planting area free of weeds to reduce competition for nutrients and water.
- Pest Monitoring: Watch for aphids, slugs, or caterpillars. Handpick pests or use natural remedies like neem oil or soapy water.
- Fertilization: Apply a light organic fertilizer every 2–3 weeks to promote lush, leafy growth.
Proper maintenance ensures a healthy, productive salad bed.
Step 8: Harvesting
Salad greens are best harvested when tender and flavorful:
- Baby Leaves: Harvest as soon as leaves reach 2–4 inches for a mild, delicate taste.
- Cut-and-Come-Again: Use scissors to trim outer leaves, leaving the central growing point intact. This encourages continuous growth.
- Timing: Morning harvest is ideal, as leaves are crisp and hydrated.
- Frequency: Harvest every 1–2 weeks to maintain productivity and prevent over-mature leaves.
Regular harvesting promotes new leaf growth, extending your salad season.
Step 9: Extending the Growing Season
You can grow salad greens almost year-round with these strategies:
- Succession Planting: Sow new seeds every 2–3 weeks for a continuous harvest.
- Indoor Cultivation: Use trays or containers with grow lights during colder months.
- Cold Protection: Use row covers or cold frames to extend growth during early spring or late fall.
- Heat-Tolerant Varieties: Plant greens like Malabar spinach or New Zealand spinach during summer months.
By planning strategically, you can enjoy a continuous supply of fresh greens for months on end.
Step 10: Creative Salad Mix Combinations
Mixing textures, flavors, and colors enhances your salads:
- Mild and Tender: Lettuce, butterhead, baby spinach
- Peppery and Spicy: Arugula, mustard greens, mizuna
- Crunchy and Colorful: Red leaf lettuce, chard, radish greens
Creating your own custom salad mix not only adds nutritional variety but also visual appeal to your meals.
Benefits of Growing Salad Mix Greens at Home
- Convenience: Fresh greens at your fingertips, ready for salads, sandwiches, or smoothies.
- Sustainability: Reduce packaging waste and carbon footprint from store-bought greens.
- Control: You decide how to fertilize and protect your plants, ensuring chemical-free produce.
- Cost Savings: Growing at home is economical, especially for high-value greens like arugula or baby kale.
- Creativity: Experiment with different mixes, flavors, and textures to suit your personal taste.
Homegrown salad mixes provide unmatched satisfaction and freshness that commercial greens rarely match.
Conclusion
Growing lush salad mix greens at home is not only achievable but also rewarding. By following these ten steps—from choosing the right varieties, preparing soil, sowing seeds, and maintaining proper care—you can cultivate tender, flavorful, and nutritious greens year-round. Whether you have a small balcony, a sunny windowsill, or a backyard garden, salad greens adapt to almost any space, giving you continuous harvests of fresh, vibrant leaves.
With homegrown salad mixes, you gain full control over quality, flavor, and nutritional value while enjoying the satisfaction of growing your own food. By combining proper planting techniques, regular maintenance, and creative mixes, you can create a garden that not only feeds your body but also nourishes your love for gardening.
Start small, experiment with different varieties, and watch as your garden transforms into a thriving, lush salad oasis. Soon, you’ll be enjoying crisp, nutrient-packed greens straight from your garden to your table—delicious, fresh, and naturally satisfying.