Amaranth, with its vibrant leaves, striking flower heads, and high nutritional value, has become a favorite among home gardeners and culinary enthusiasts alike. Known as a superfood, amaranth offers both edible greens and nutrient-rich seeds, making it a versatile addition to any garden. One of the most effective ways to enjoy a continuous harvest of its tender leaves is the “cut and come again” technique, a method that encourages repeated growth without harming the plant.
In this complete guide, you’ll learn how to grow amaranth, understand the benefits of cut-and-come-again harvesting, and get practical tips for maximizing yield and flavor.
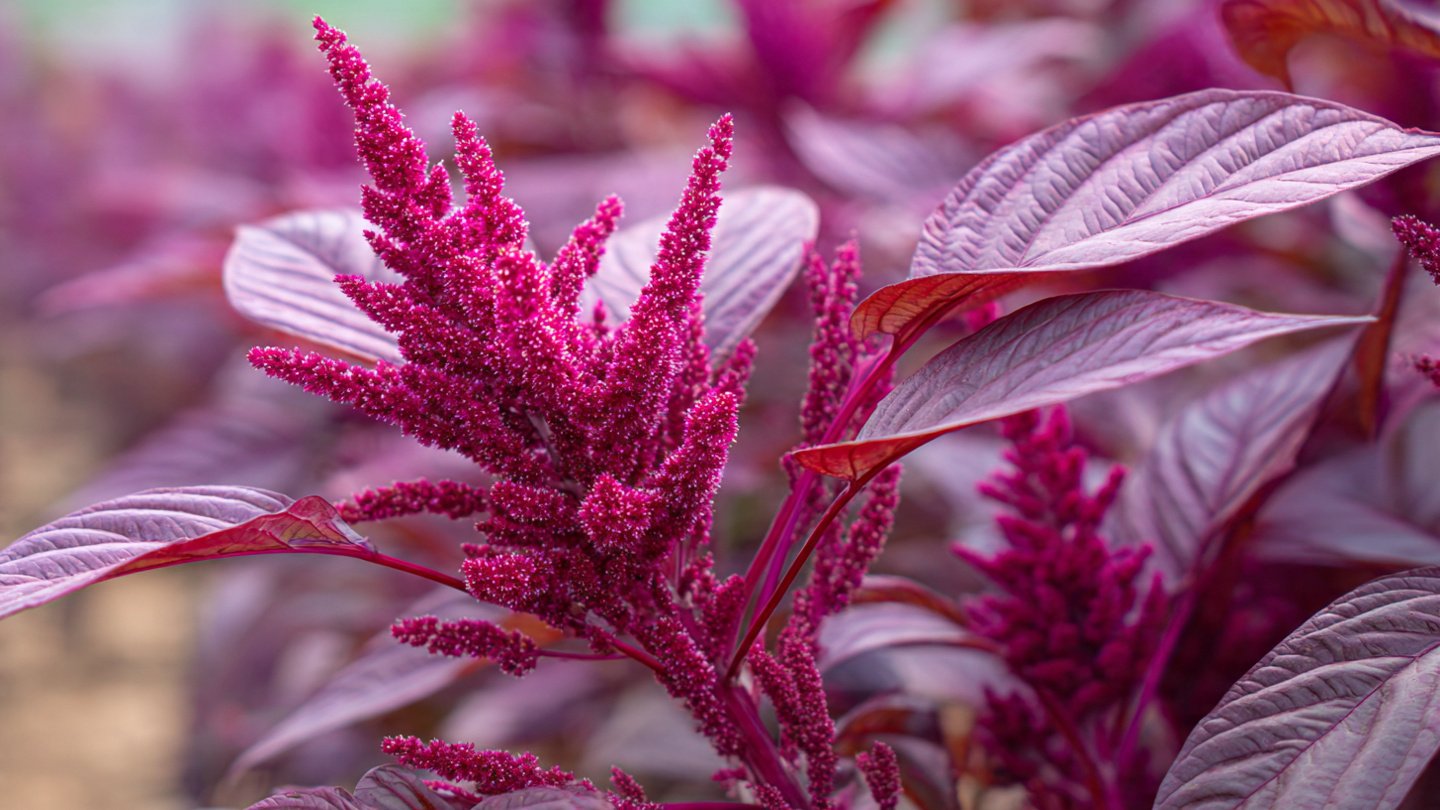
What Is Amaranth?
Amaranth is a fast-growing annual plant that belongs to the Amaranthaceae family. It is cultivated for:
- Edible leaves, which are rich in vitamins A, C, and K
- Protein-packed seeds, often called pseudo-cereals
- Ornamental purposes, thanks to its colorful, plume-like flower heads
Native to Central and South America, amaranth thrives in warm climates and is remarkably easy to grow, even in small spaces.
Why Grow Amaranth Using Cut-and-Come-Again Techniques?
Cut-and-come-again harvesting involves removing only part of the plant’s leaves or stems, allowing it to continue growing for multiple harvests. This technique has several advantages:
1. Continuous Supply
Instead of harvesting the entire plant at once, you can enjoy fresh leaves over several weeks or months.
2. Promotes Bushier Growth
Regularly trimming encourages lateral branching, resulting in a fuller, more productive plant.
3. Reduces Waste
You take only what you need while leaving enough foliage for the plant to thrive.
4. Extends Harvest Window
By cutting selectively, the plant can produce edible leaves throughout the growing season, especially in warm weather.
Choosing the Right Amaranth Varieties
Not all amaranth is the same. Some varieties are better for leaf production, while others are grown for seeds or ornamental beauty.
Leafy Varieties for Cut-and-Come-Again:
- Amaranthus tricolor – also known as Joseph’s Coat, colorful leaves
- Amaranthus dubius – tender, mild-flavored greens
- Amaranthus cruentus – broad leaves, grows fast
When growing amaranth for continuous leaf harvest, select leafy varieties rather than seed-focused cultivars.
Preparing Your Garden for Amaranth
Amaranth is easy to grow, but proper preparation ensures healthy growth and maximum harvest.
Soil Requirements:
- Well-drained, loamy soil
- Slightly acidic to neutral pH (6.0–7.5)
- Rich in organic matter
Sunlight:
- Full sun for at least 6–8 hours per day
- Warm temperatures encourage rapid growth
Space:
- Plant seeds 6–12 inches apart to allow room for branching
- Use succession planting for continuous harvest
Step 1: Sowing Amaranth Seeds
Amaranth seeds are tiny but easy to germinate.
Indoor Sowing:
- Start seeds indoors 3–4 weeks before the last frost
- Sow ¼ inch deep in seed trays
- Keep soil consistently moist
- Transplant seedlings when they reach 4–6 inches tall
Direct Sowing:
- Sow seeds after the last frost when soil is warm
- Lightly cover with soil
- Keep the soil moist until germination (5–14 days)
Step 2: Watering and Feeding
Watering:
- Amaranth prefers even moisture, especially during early growth
- Avoid waterlogging, which can cause root rot
Fertilization:
- Incorporate compost or organic matter before planting
- Light side-dressing with nitrogen-rich fertilizer encourages leaf growth
- Avoid excessive fertilization, which may delay flowering
Step 3: Practicing Cut-and-Come-Again
Cut-and-come-again works best when amaranth leaves are young and tender.
How to Harvest:
- Wait until plants are 6–8 inches tall
- Use clean scissors or garden shears
- Cut only the outer leaves, leaving the central growing point intact
- Take no more than one-third of the foliage at a time
- Harvest regularly, every 1–2 weeks
Benefits of This Technique:
- Plants continue to produce new leaves quickly
- Encourages a bushier, more productive plant
- Allows multiple harvests from the same crop
Step 4: Succession Planting for Continuous Supply
To ensure an uninterrupted harvest:
- Sow new seeds every 2–3 weeks
- Space plants adequately for airflow
- Harvest older plants while younger seedlings mature
This approach guarantees a steady supply of fresh amaranth leaves all season long.
Step 5: Companion Planting and Pest Control
Amaranth is relatively pest-resistant but may occasionally attract:
- Aphids
- Leaf miners
- Flea beetles
Natural Pest Control:
- Use neem oil or insecticidal soap for infestations
- Encourage beneficial insects like ladybugs and lacewings
- Interplant with marigolds or basil to deter pests
Amaranth’s fast growth and bushy habit also help shade out weeds, reducing competition.
Step 6: Flowering and Seed Harvest
If you let some plants flower:
- Amaranth produces striking plume-like flower heads
- Seeds can be collected for future sowing or culinary use
- Flowering may slow leaf production; selectively let some plants bloom while maintaining leafy harvest from others
Step 7: Indoor and Container Growing
Amaranth is well-suited for containers and indoor gardening.
Tips for Indoor Growth:
- Use deep pots (12 inches or more) with good drainage
- Place near a sunny window or under grow lights
- Harvest leaves using cut-and-come-again technique
- Rotate pots for even sunlight exposure
This method works well for apartment gardeners or small spaces.
Benefits of Growing Amaranth at Home
Growing your own amaranth offers several advantages:
1. Nutritional Value
- Leaves are high in vitamins A, C, and K
- Rich in calcium, iron, and antioxidants
- Seeds provide protein and fiber
2. Culinary Versatility
- Young leaves: stir-fries, soups, salads
- Mature leaves: sautéed or steamed
- Seeds: ground into flour, added to porridge, or used in baking
3. Sustainability
- Homegrown amaranth reduces reliance on store-bought greens
- Seed saving allows for annual cultivation without buying seeds
Common Mistakes to Avoid
- Cutting too much at once – slows growth and weakens the plant
- Neglecting watering – dry conditions reduce leaf quality
- Overcrowding plants – limits airflow, increases disease risk
- Waiting too long to harvest – leaves become tough and less flavorful
- Ignoring pest management – aphids or beetles can damage leaves
Avoiding these pitfalls ensures healthy, productive amaranth plants.
Harvesting Schedule for Maximum Yield
- First harvest: 6–8 weeks after sowing
- Subsequent harvests: every 1–2 weeks
- Continue harvesting until first frost or seed set
By staggering your harvest and using cut-and-come-again, you can enjoy a steady supply of tender leaves throughout the growing season.
Final Thoughts
Amaranth is a beautiful, nutritious, and easy-to-grow plant that fits perfectly into modern home gardens. By using the cut-and-come-again technique, gardeners can enjoy multiple harvests of tender leaves without sacrificing the plant’s health or longevity. With proper soil, sunlight, watering, and pest management, amaranth thrives both outdoors and indoors, making it an ideal crop for beginners, health-conscious gardeners, and small-space growers.
Whether you’re looking to enhance your meals, support pollinators, or simply enjoy a vibrant and productive garden, growing amaranth using these methods ensures fresh, continuous greens and a truly rewarding gardening experience.