Mint is one of the most versatile, fragrant, and easy-to-grow herbs in any home garden. From teas and desserts to savory dishes and cocktails, fresh mint adds a vibrant flavor and aroma that cannot be replicated with dried leaves. While mint spreads easily in soil, one of the fastest and most satisfying ways to propagate it is by rooting cuttings in a water glass. This simple method allows you to grow new mint plants quickly, observe root development, and ensure strong, healthy plants before transplanting them into soil.
In this guide, we’ll explore the step-by-step process for successfully rooting fast mint cuttings in a water glass, common mistakes to avoid, and tips to nurture vigorous plants ready for your kitchen or garden.
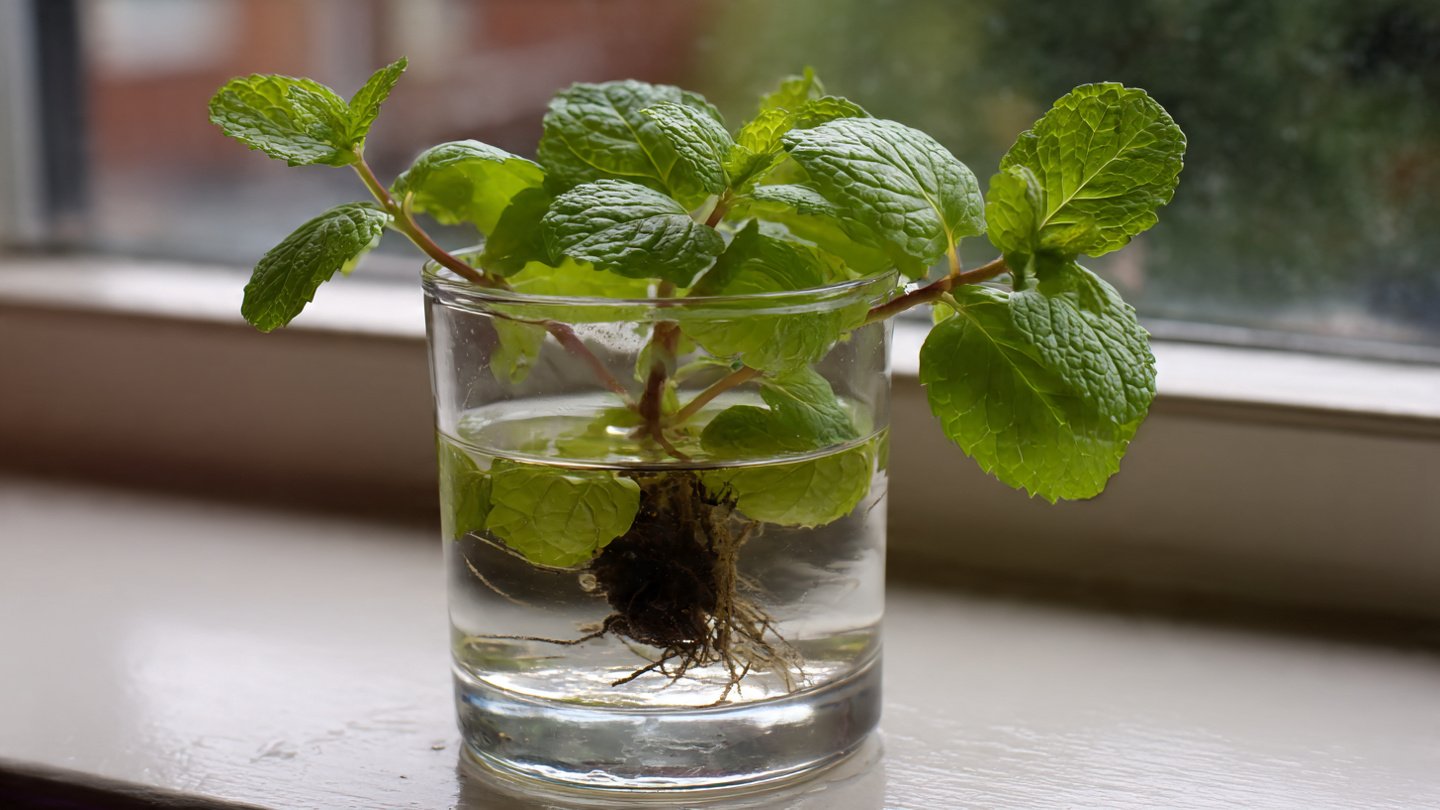
Why Root Mint Cuttings in Water?
Rooting mint in water is a popular method for several reasons:
- Rapid root development: Mint cuttings often develop roots within 7–14 days.
- Easy observation: You can monitor root growth directly in a glass.
- Minimal equipment: All you need is a glass of water and some healthy stems.
- Higher success rate: Unlike soil propagation, water reduces transplant shock and ensures cuttings stay hydrated.
Rooting mint in water is particularly helpful for beginners or those looking to expand their herb collection without planting seeds, which take longer to germinate.
Choosing the Right Mint Cuttings
Selecting healthy, vigorous cuttings is the foundation for fast rooting success.
Best Cuttings:
- Choose new growth: young, green stems rather than woody, mature ones.
- Length: ideal cuttings are 4–6 inches long, with 3–5 sets of leaves.
- Avoid damaged or yellowing stems, as these may rot in water.
- Optional: pinch off the top leaves to encourage root formation.
Healthy cuttings not only root faster but also produce strong, aromatic plants once transferred to soil.
Preparing Mint Cuttings for Water Rooting
Before placing cuttings in water, proper preparation is key to success.
Steps:
- Trim the cuttings: Cut just below a leaf node (the point where leaves grow from the stem). This node will produce roots.
- Remove lower leaves: Strip off the bottom 1–2 sets of leaves to prevent them from sitting in water, which can cause decay.
- Optional: Trim top leaves lightly: Reducing the leaf surface area decreases water loss through transpiration while roots develop.
- Use clean tools: Always use sterilized scissors or pruning shears to reduce the risk of bacterial contamination.
Proper preparation ensures the cuttings are focused on root development rather than maintaining foliage.
Setting Up Your Water Glass
The water glass environment must be ideal for root growth.
Key Factors:
- Water type: Use room-temperature, non-chlorinated water. Tap water can be used if left to sit for 24 hours to allow chlorine to dissipate. Filtered or rainwater is ideal.
- Water depth: Fill the glass so that the bottom 1–2 nodes of the cutting are submerged. Avoid fully immersing leaves.
- Glass size: Use a tall, narrow glass to support the cutting upright. Alternatively, a jar or vase works well.
- Light: Place the glass in bright, indirect sunlight. Direct sunlight can overheat the water and damage delicate stems.
- Temperature: Maintain a warm room temperature between 65–75°F (18–24°C) for optimal root growth.
Creating the right conditions in the glass allows roots to develop quickly and reduces the risk of rot.
Rooting Process and Maintenance
Once the cuttings are in water, simple maintenance ensures healthy, fast rooting.
Steps:
- Monitor water levels: Keep the nodes submerged and add water as needed.
- Change water regularly: Replace water every 2–3 days to prevent stagnation and bacterial growth.
- Observe root development: Within 7–14 days, small white roots should emerge from the nodes. Growth may vary depending on light and temperature.
- Thin out weak cuttings: If you placed multiple cuttings in one glass, remove weaker stems to allow stronger ones to thrive.
Patience and regular care during this period are crucial for developing healthy roots.
Troubleshooting Common Issues
Even with careful setup, problems can arise. Here’s how to handle them:
1. Leaves Rotting in Water
- Cause: Leaves submerged in water or bacterial growth.
- Solution: Remove any submerged leaves and refresh the water. Ensure only nodes are submerged.
2. No Root Growth
- Cause: Cold temperatures, insufficient light, or old cuttings.
- Solution: Move the glass to a warmer, brighter spot and use fresh cuttings if necessary.
3. Water Turning Cloudy
- Cause: Bacterial buildup or decaying leaves.
- Solution: Change water immediately and clean the glass thoroughly.
Addressing issues promptly ensures cuttings continue to develop without setbacks.
Transplanting Rooted Mint Cuttings
Once roots are 1–3 inches long, it’s time to transfer cuttings into soil.
Steps:
- Prepare a pot: Use well-draining potting mix in a container with drainage holes.
- Plant carefully: Dig a small hole, place the rooted cutting, and gently firm the soil around it.
- Water lightly: Keep the soil moist but not soggy to avoid root shock.
- Acclimate to direct light: Initially, provide bright, indirect light before exposing the plant to full sun.
With proper care, your newly rooted cuttings will establish quickly and continue producing vigorous growth.
Tips for Maximizing Mint Growth
- Pinch regularly: Removing the top leaves encourages bushy growth and prevents legginess.
- Harvest leaves carefully: Avoid taking more than one-third of the plant at a time.
- Repot as needed: Mint grows quickly; repot every 2–3 months for indoor plants.
- Fertilize sparingly: Use balanced, water-soluble fertilizer every few weeks to support growth.
Following these tips ensures that your water-rooted mint thrives long after transplantation.
Advantages of Water Rooting Mint
Water rooting is not only simple but also has multiple benefits:
- Faster propagation: Roots develop more quickly than in soil cuttings.
- Easy monitoring: You can see roots form and assess plant health.
- Low risk of drought stress: Cuttings remain hydrated while rooting.
- Minimal equipment: All you need is a glass, water, and cuttings.
For beginner gardeners, this method is a fail-safe way to expand your mint supply efficiently.
Ideal Varieties for Water Rooting
Most mint varieties root easily in water. Some popular types include:
- Peppermint: Strong aroma, fast-growing.
- Spearmint: Sweet flavor, ideal for teas and culinary uses.
- Chocolate mint: Adds unique flavor to desserts.
- Apple mint: Mild, fruity scent, perfect for garnishes.
Experimenting with multiple varieties allows you to enjoy diverse flavors in your kitchen.
Seasonal Considerations
While mint can be propagated year-round indoors, timing affects rooting speed:
- Spring and summer: Faster rooting due to higher light and warmth.
- Fall and winter: Slower growth; ensure bright light or use supplemental grow lights.
Adjusting for seasonal conditions ensures consistent success regardless of the time of year.
Common Mistakes to Avoid
- Submerging leaves instead of nodes.
- Using cold or chlorinated water without letting it sit.
- Crowding multiple cuttings in a single glass.
- Ignoring light and temperature needs.
- Transplanting before roots are strong enough.
Avoiding these pitfalls ensures fast, healthy propagation and reduces failure rates.
Conclusion
Rooting mint cuttings in a water glass is an easy, efficient, and satisfying method for expanding your herb collection. By choosing healthy cuttings, preparing them correctly, maintaining proper water and light conditions, and transplanting rooted cuttings carefully, you can enjoy a steady supply of fresh, aromatic mint for your kitchen, teas, cocktails, and garden.
This propagation method is particularly useful for beginners, urban gardeners, or anyone looking to multiply their mint plants quickly. With patience, observation, and regular care, even a single cutting can grow into a thriving plant, providing fresh leaves throughout the year.
Whether you’re making mint tea on a chilly afternoon or garnishing summer desserts, successfully rooted mint cuttings in a water glass ensure your culinary creations are always bright, flavorful, and aromatic.
If you want, I can also make a visual step-by-step guide for water-rooting mint showing preparation, rooting, and transplanting phases, which is perfect for beginners.
Do you want me to create that next?