Mint is one of the most versatile, fragrant, and easy-to-grow herbs, loved by gardeners and home cooks alike. Its bright green leaves can enhance teas, desserts, salads, sauces, and even drinks like mojitos. Beyond its culinary uses, mint has medicinal properties, including aiding digestion, reducing inflammation, and freshening breath. While growing mint is simple, it is a vigorous plant that spreads quickly and can take over your garden if not contained. Using self-watering pots at home offers a convenient, efficient, and space-saving solution to grow mint effortlessly year-round. This complete guide will show you how to cultivate healthy, lush mint in self-watering containers, even if you are a beginner.
Why Grow Mint at Home?
Growing mint at home has many advantages:
- Fresh Supply: You’ll always have fresh leaves for cooking or tea.
- Cost-Effective: Save money by avoiding store-bought mint.
- Easy Maintenance: Mint is hardy and grows well with minimal care.
- Control Over Growth: Self-watering pots prevent the plant from spreading uncontrollably.
- Indoor and Balcony Gardening: Mint grows well in small spaces, making it ideal for apartments.
Why Use Self-Watering Pots?
Self-watering pots are specially designed containers that allow plants to absorb water as needed through a reservoir at the bottom. These pots are ideal for growing mint because:
- Consistent Moisture: Mint prefers consistently moist soil, and self-watering pots prevent drying out.
- Reduced Watering Effort: The reservoir eliminates the need to water daily.
- Healthier Roots: Plants develop strong, healthy root systems in well-drained soil.
- Prevent Overwatering: Excess water drains into the reservoir, preventing root rot.
Using a self-watering pot ensures your mint thrives even if you are busy or away for a few days.
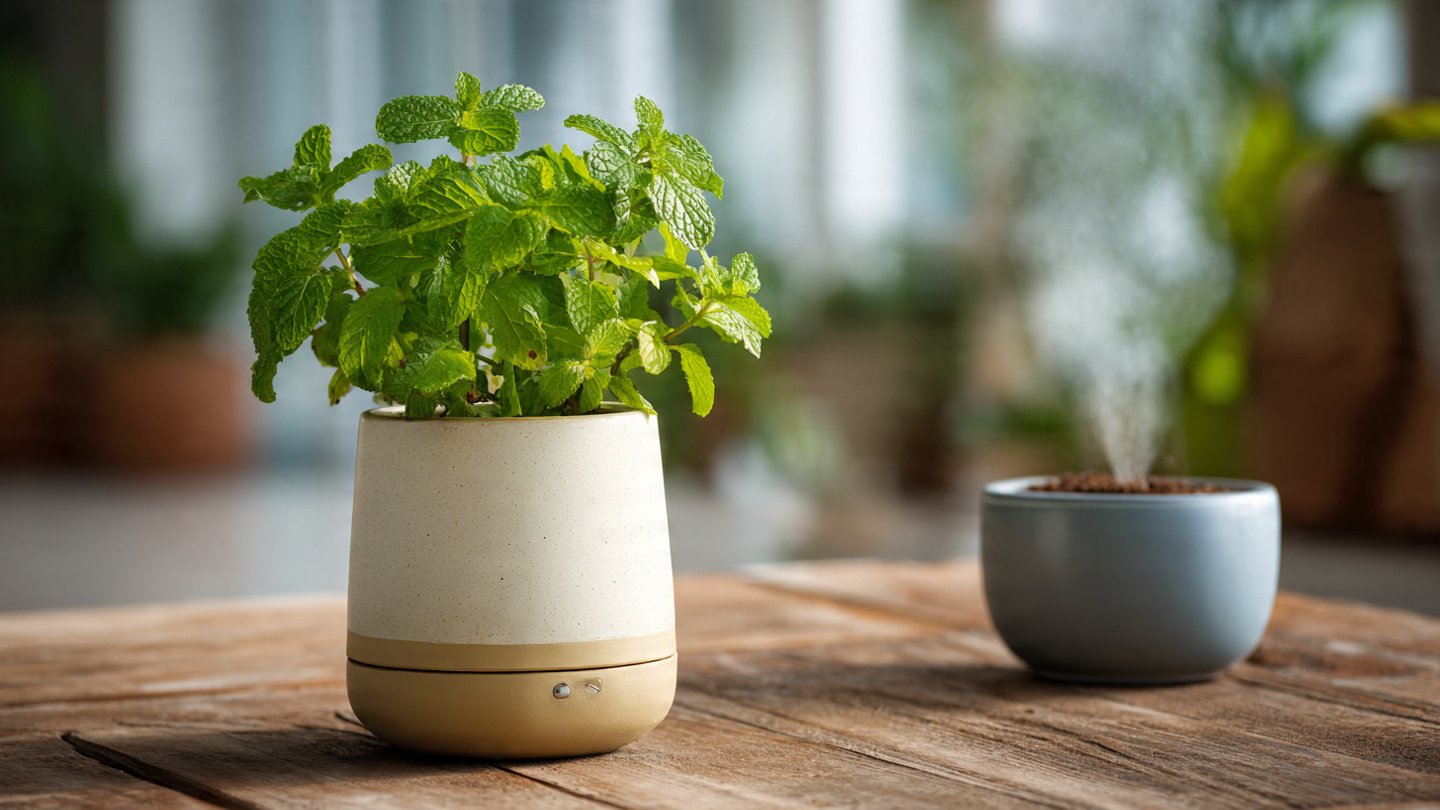
Step 1: Choosing the Right Self-Watering Pot
Self-watering pots come in various sizes, materials, and designs. For mint, consider these factors:
- Size: Choose a pot at least 8–10 inches in diameter to accommodate mint’s root system.
- Material: Plastic, ceramic, or resin pots work well. Plastic pots are lightweight and ideal for moving indoors or outdoors.
- Reservoir: Ensure the pot has a sufficient water reservoir and a wicking system that draws water up to the soil as needed.
- Drainage: Check for overflow holes or a system to prevent stagnant water.
A good self-watering pot will support mint growth for several months without frequent refilling.
Step 2: Selecting the Right Mint Variety
Mint comes in many varieties, each with unique flavors and growth habits. Choose a variety that suits your needs and taste preferences:
- Spearmint: Common for culinary use and beverages. Mild flavor.
- Peppermint: Strong aroma, slightly spicy flavor, ideal for teas and medicinal use.
- Chocolate Mint: Sweet, chocolatey scent and flavor, perfect for desserts.
- Apple Mint: Fruity aroma and taste, suitable for salads and teas.
For beginners, spearmint or peppermint is recommended because they are hardy, fast-growing, and easy to maintain.
Step 3: Preparing the Soil
Mint prefers fertile, well-draining soil with a slightly acidic to neutral pH (6.0–7.0). Using high-quality potting soil ensures optimal growth.
Steps to Prepare the Soil:
- Mix potting soil with compost or organic matter to boost nutrients.
- Ensure the soil is light and fluffy to allow proper root aeration.
- Add perlite or vermiculite to improve drainage.
Tip: Avoid garden soil, as it may compact in containers and harbor pests.
Step 4: Planting Mint
Mint can be grown from seeds, cuttings, or small nursery plants. Cuttings are the fastest method for a quick start.
Planting Steps:
- Fill the self-watering pot with prepared soil, leaving about 2 inches from the top.
- Plant mint cuttings or young plants about 6–8 inches apart.
- Firm the soil gently around the roots.
- Water the soil thoroughly, allowing the reservoir to fill.
Tip: For faster establishment, place the pot in a spot with indirect sunlight for the first week.
Step 5: Choosing the Right Location
Mint thrives in bright, indirect sunlight.
- Indoors: Place the pot near a sunny window that receives at least 4–6 hours of sunlight daily.
- Balcony or Patio: Morning sun with afternoon shade works best to prevent scorching.
- Temperature: Mint prefers moderate temperatures between 18°C and 25°C.
Tip: Rotate the pot occasionally to ensure even growth on all sides.
Step 6: Watering and Maintaining Moisture
One of the biggest advantages of self-watering pots is maintaining consistent moisture. Mint requires evenly moist soil but should not sit in waterlogged conditions.
Maintenance Tips:
- Keep the reservoir filled with fresh water.
- Refill the reservoir weekly or as indicated by the water level marker.
- Check the soil periodically; the top layer should be moist but not soggy.
Tip: Use rainwater or filtered water for the best results, as mint prefers slightly soft water.
Step 7: Fertilizing Your Mint
Mint is a fast-growing herb and benefits from regular feeding.
- Organic Fertilizers: Compost tea, worm castings, or liquid seaweed extract provide nutrients without chemical buildup.
- Frequency: Fertilize every 3–4 weeks for healthy, vigorous growth.
- Avoid Overfertilization: Too much nitrogen can lead to excessive leaf growth but reduce essential oils and flavor.
Tip: Lightly pinch back leaves while fertilizing to encourage bushier growth.
Step 8: Pruning and Harvesting
Pruning is essential to keep mint bushy, healthy, and flavorful.
Pruning Tips:
- Regularly trim the tips of stems to encourage lateral growth.
- Remove any flowering stems; flowers reduce leaf production and flavor.
- Harvest leaves from the top, leaving the lower stems intact for continuous growth.
Harvesting Guidelines:
- Harvest leaves in the morning when essential oils are most concentrated.
- You can harvest up to 1/3 of the plant at a time to allow regrowth.
- Use scissors or pinch by hand to avoid damaging the plant.
Tip: Frequent harvesting keeps the plant productive and prevents legginess.
Step 9: Controlling Pests and Diseases
Mint is relatively pest-resistant but can occasionally attract aphids, spider mites, or whiteflies.
Organic Control Measures:
- Spray with a mixture of water and mild soap.
- Introduce beneficial insects like ladybugs to control pests naturally.
- Ensure good airflow around the pot to prevent fungal diseases.
Tip: Avoid chemical pesticides in edible herbs; natural methods are safer and maintain flavor.
Step 10: Propagating Mint
Mint is easy to propagate, allowing you to expand your collection or share plants with friends.
- Cuttings: Take 4–6 inch stem cuttings, remove lower leaves, and place in water until roots develop.
- Division: Split the root ball of a mature plant and replant in separate pots.
Tip: Propagated mint grows quickly in self-watering pots, making it ideal for continuous harvests.
Benefits of Growing Mint in Self-Watering Pots
- Effortless Maintenance: Reduced daily watering and easy monitoring.
- Year-Round Harvest: Control over sunlight and water allows continuous growth indoors.
- Space-Saving: Ideal for balconies, windowsills, and small urban gardens.
- Healthier Plants: Consistent moisture promotes lush leaves and prevents stress.
- Aesthetic Appeal: Mint adds greenery and fragrance to your home environment.
Conclusion
Growing mint at home is easy, rewarding, and sustainable, especially when using self-watering pots. By selecting the right variety, preparing fertile soil, providing consistent moisture, and practicing regular pruning and harvesting, you can enjoy fresh, fragrant mint leaves all year round. Self-watering pots simplify maintenance, prevent over- or under-watering, and make mint cultivation accessible to anyone, even beginners.
Whether you want mint for cooking, beverages, or natural remedies, this complete guide ensures your herb garden thrives with minimal effort. Start your mint-growing journey today and experience the joy of harvesting vibrant, flavorful leaves right from your home.