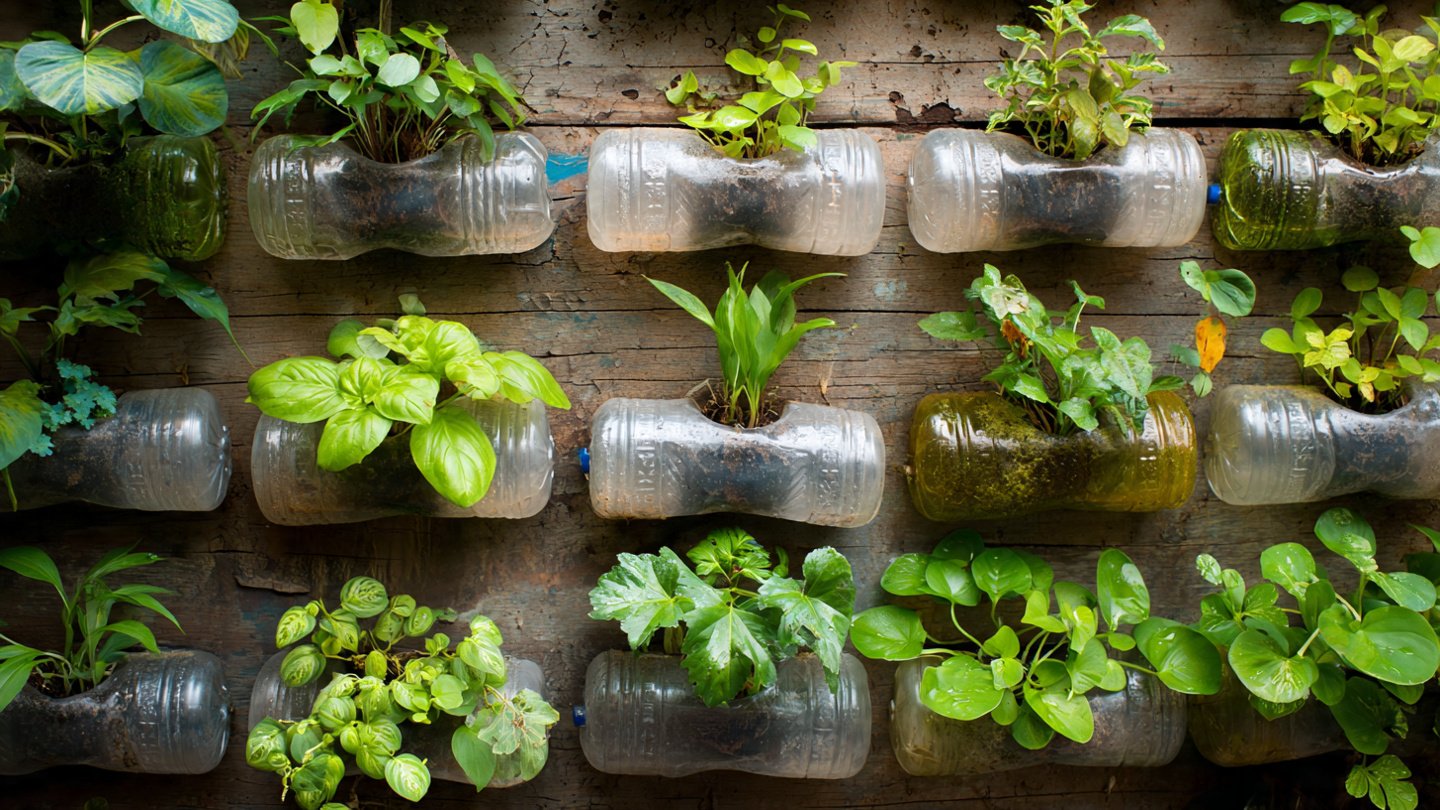
In a world where space is shrinking and waste is growing, finding creative ways to live sustainably has never been more important. One simple, practical, and surprisingly beautiful solution is creating a vertical garden from plastic bottles. This easy DIY project transforms everyday waste into a lush green wall, allowing you to grow herbs, vegetables, or decorative plants even in the smallest spaces. Whether you live in an apartment or want to add greenery to a blank wall, a plastic bottle vertical garden is affordable, eco-friendly, and deeply satisfying.
Why Choose a Plastic Bottle Vertical Garden?
Plastic bottles are among the most common household waste items, and they often end up in landfills or oceans. Reusing them for gardening reduces plastic waste while giving you a productive growing space. Vertical gardens also maximize limited space by growing upward instead of outward, making them perfect for balconies, patios, fences, or indoor walls with enough light.
Beyond sustainability, vertical gardens improve air quality, enhance mental well-being, and bring fresh food closer to your kitchen. This project requires minimal tools, low investment, and no advanced gardening experience.
What You Can Grow in a Bottle Vertical Garden
Before starting, it’s helpful to know what grows best in plastic bottles. Because bottles have limited space, shallow-rooted plants work best.
Ideal plants include:
- Herbs like basil, mint, parsley, coriander, and thyme
- Leafy greens such as lettuce, spinach, and arugula
- Small vegetables like chili peppers or green onions
- Ornamental plants like pothos, spider plants, and ferns
Choosing the right plants ensures healthy growth and reduces maintenance issues.
Materials You Will Need
Creating a vertical garden from plastic bottles doesn’t require expensive supplies. Most materials are easy to find at home or nearby.
You will need:
- Empty plastic bottles (1.5–2 liter bottles work best)
- Sharp cutter or scissors
- Rope, wire, or strong string
- Nails, hooks, or screws
- Potting soil
- Compost or organic fertilizer
- Small stones or gravel for drainage
- Plants or seeds
- Marker and ruler
Make sure bottles are clean and labels are removed before starting.
Preparing the Plastic Bottles
Start by preparing the bottles that will act as plant containers. Lay a bottle horizontally and draw a rectangle on one side, leaving at least two inches from the bottom and sides. Cut along the marked area to create an opening where plants will grow.
Next, poke a few small holes at the bottom of the bottle for drainage. This step is essential to prevent water from collecting and causing root rot. If you plan to hang the bottles, make two small holes on opposite sides near the top and bottom to thread the rope or wire through.
Rinse the bottles thoroughly to remove any residue before filling them with soil.
Choosing the Right Location
Location plays a major role in the success of your vertical garden. Most edible plants require at least 4–6 hours of sunlight daily. A sunny balcony, terrace wall, window grill, or outdoor fence is ideal.
If you plan to install your garden indoors, place it near a bright window or use grow lights. Make sure the wall or surface can handle some moisture, or use a backing sheet to protect it.
Assembling the Vertical Structure
There are several ways to arrange your bottle garden, depending on your space and creativity. The most common method is a hanging vertical row.
Thread the rope or wire through the holes in the bottles, stacking them vertically with enough space between each bottle for plant growth. Tie secure knots beneath each bottle to hold them in place. Once assembled, hang the structure from a hook, nail, or railing.
Alternatively, bottles can be attached directly to a wall or wooden frame using wire or zip ties. Make sure everything is securely fastened before adding soil and plants.
Filling Bottles with Soil
Place a thin layer of small stones or gravel at the bottom of each bottle to improve drainage. Then fill the bottle with potting soil mixed with compost. Avoid packing the soil too tightly, as roots need air to grow.
Leave about an inch of space at the top to prevent soil from spilling during watering.
Planting Seeds or Seedlings
Now comes the fun part—planting. If you’re using seedlings, gently place them into the soil, ensuring roots are well covered. Firm the soil lightly around the base of the plant.
If planting seeds, follow recommended depth instructions for each plant type. Water gently after planting to settle the soil.
For a visually pleasing garden, mix different plants with varying colors and textures. Trailing plants look especially beautiful in vertical gardens as they cascade downward.
Watering Your Vertical Garden
Vertical gardens dry out faster than traditional gardens, so consistent watering is important. Water slowly from the top so moisture trickles down to lower bottles. Be careful not to overwater, as excess water will drain out through the holes.
In hot weather, you may need to water daily. In cooler seasons, watering every two to three days is usually enough. Check soil moisture by touching it before watering.
Feeding and Maintenance
Because plastic bottles hold limited soil, nutrients can deplete quickly. Feed your plants every two to three weeks with compost tea or diluted organic fertilizer.
Regular maintenance includes:
- Removing yellow or dead leaves
- Checking for pests
- Pruning herbs to encourage bushy growth
- Ensuring drainage holes are not blocked
A few minutes of care each week keeps your garden healthy and productive.
Managing Pests Naturally
Vertical gardens often experience fewer pest problems, but they’re not immune. Aphids, ants, and mites can occasionally appear.
Natural pest control methods include:
- Spraying plants with neem oil
- Using mild soap water
- Encouraging beneficial insects
- Keeping plants clean and healthy
Avoid chemical pesticides, especially if you’re growing edible plants.
Benefits of a Plastic Bottle Vertical Garden
This simple DIY project offers benefits beyond fresh produce. It reduces plastic waste, lowers grocery expenses, and promotes a greener lifestyle. It also adds natural beauty to dull spaces and provides a relaxing hobby that reduces stress.
For families, it’s a great educational activity that teaches children about recycling, responsibility, and where food comes from.
Expanding and Customizing Your Garden
Once you gain confidence, you can expand your vertical garden by adding more rows or experimenting with different bottle sizes. Painting bottles or adding labels can enhance visual appeal and organization.
You can even create themed gardens, such as a herb wall for cooking or a decorative green wall for relaxation.
A Simple Step Toward Sustainable Living
Creating a vertical garden from plastic bottles proves that sustainable living doesn’t have to be complicated or expensive. With creativity, basic tools, and a bit of care, you can turn waste into something beautiful and useful.
This small step not only brings greenery into your life but also contributes to a healthier planet. One bottle at a time, you can grow food, reduce waste, and create a living reminder that sustainability starts at home.