Vertical gardens have rapidly become one of the most creative and space-saving ways to bring greenery into homes, balconies, and small yards. But did you know that something as simple as a wooden pallet can be transformed into a stunning vertical garden? Repurposing pallets not only saves money but also promotes sustainability by recycling materials that might otherwise go to waste. In this comprehensive guide, we’ll explore how to turn ordinary wooden pallets into beautiful, thriving vertical gardens, step by step.
Why Choose Pallets for a Vertical Garden?
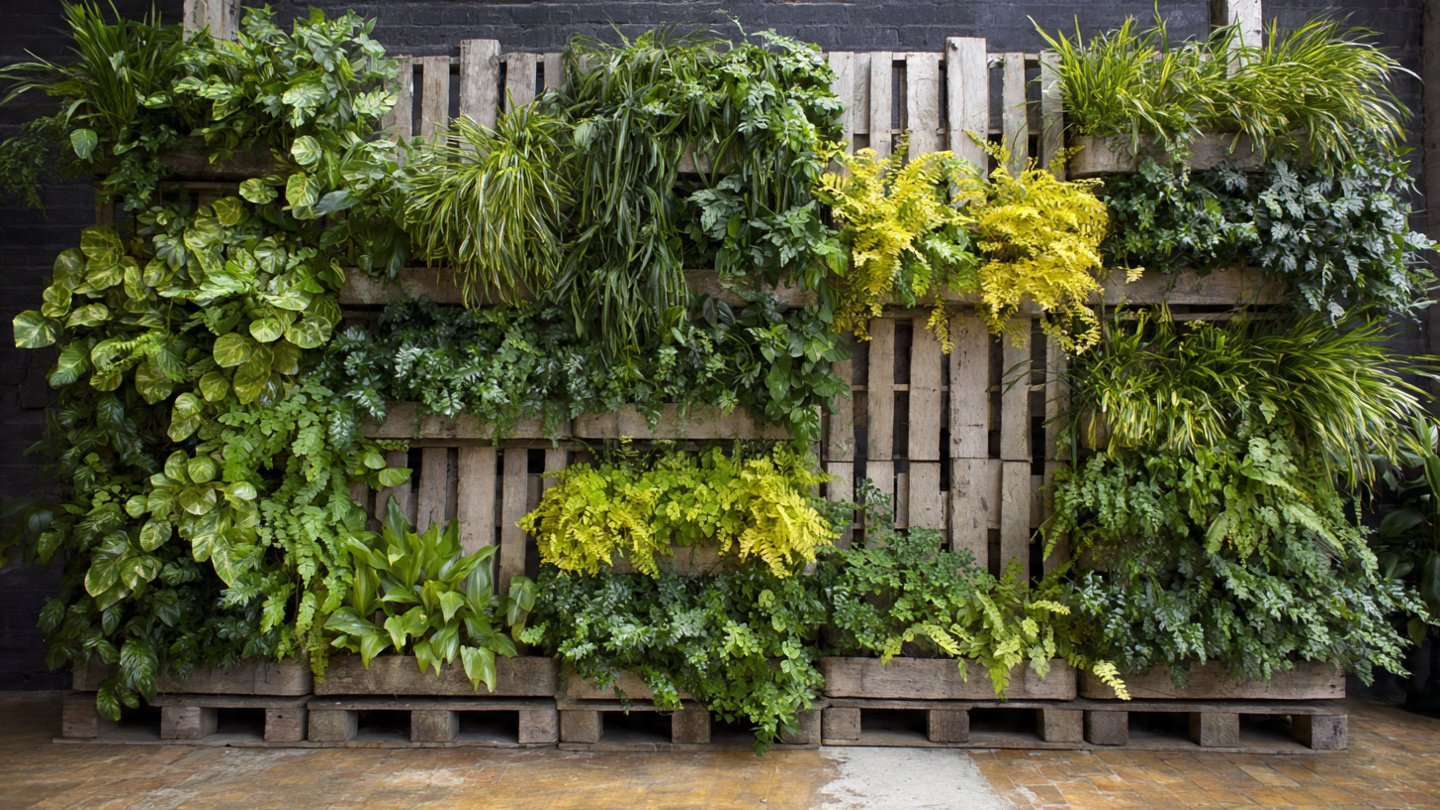
Wooden pallets are abundant, inexpensive, and versatile, making them ideal for vertical gardening. Here’s why they are so popular among DIY gardeners:
- Eco-friendly: Using pallets reduces waste and keeps wood out of landfills.
- Space-saving: Perfect for small spaces, balconies, patios, or indoor areas.
- Customizable: You can adjust the size, shape, and design to suit your space and plant choices.
- Affordable: Often free or very low-cost, pallets allow you to create a garden without breaking the bank.
Whether you want a lush green wall, an herb garden, or a colorful flower display, pallets provide a flexible foundation for creativity.
Step 1: Selecting the Right Pallet
Not all pallets are suitable for gardening. Choosing the right one ensures your vertical garden is safe, durable, and long-lasting.
Tips for Choosing Pallets
- Check for heat treatment: Look for pallets stamped with “HT”, meaning they were heat-treated and safe for plants. Avoid pallets treated with chemicals (often marked “MB” for methyl bromide).
- Inspect for damage: Ensure the wood is sturdy, free from rot, mold, or splinters.
- Size matters: Standard pallets are usually around 40×48 inches. Smaller or custom sizes work better for indoor vertical gardens.
Step 2: Preparing Your Pallet
Before planting, you need to prepare the pallet to make it safe and functional for gardening.
Cleaning
- Scrub the pallet with water and a mild detergent to remove dirt, dust, and debris.
- Allow it to dry completely to prevent mold growth.
Sanding
- Lightly sand the pallet to remove rough edges or splinters. This ensures your plants—and your hands—are safe.
Water Protection
- Apply a non-toxic, plant-safe sealant to protect the wood from moisture and extend the life of your garden. Avoid chemical sealants that could harm plants.
Step 3: Choosing Your Plants
The plants you select will define the look and function of your vertical garden. Here are some options:
Indoor Pallet Gardens
- Herbs: Basil, mint, parsley, thyme, and chives thrive indoors.
- Succulents: Aloe vera, jade, echeveria, and sedum are low-maintenance and visually appealing.
- Small flowers: African violets, begonias, or small ferns add color and texture.
Outdoor Pallet Gardens
- Vegetables: Lettuce, spinach, radishes, and cherry tomatoes work well.
- Flowers: Petunias, marigolds, pansies, or nasturtiums provide vibrant blooms.
- Climbers: Ivy, morning glory, or sweet peas can drape over the pallet for a cascading effect.
When choosing plants, consider sunlight requirements and watering needs to ensure all species thrive together.
Step 4: Lining the Pallet for Planting
To hold soil and water, the pallet must be lined properly.
Materials for Lining
- Landscape fabric or burlap: Durable, breathable, and prevents soil from falling out.
- Plastic sheeting: Use food-safe plastic to keep moisture in, but punch small holes for drainage.
Lining Steps
- Lay the pallet flat with the back facing up.
- Attach the fabric or plastic using a staple gun, covering the back and sides to create a pocket for soil.
- Ensure the lining is tight and secure to prevent soil leakage when the pallet is placed upright.
Step 5: Adding Soil
The soil you choose will impact plant health and growth.
Tips for Soil
- Use a lightweight potting mix, especially if you’re hanging the pallet on a wall or railing.
- Add compost for nutrients to help plants thrive naturally.
- Avoid heavy garden soil that can weigh down the pallet and strain the wood structure.
Filling the Pallet
- Lay the pallet flat on the ground.
- Fill the pockets or cavities with soil, gently pressing it in to remove air pockets.
- Leave a small gap at the top of each pocket for watering.
Step 6: Planting Your Garden
Now comes the fun part—planting!
Planting Tips
- Start with smaller plants, as large plants can be difficult to secure in a vertical orientation.
- Mix textures and colors for an eye-catching effect.
- Plant herbs or vegetables at the bottom or middle layers where water tends to collect.
- Use flowers or trailing plants at the top for cascading beauty.
After planting, water gently to settle the soil around the roots.
Step 7: Positioning Your Pallet
Proper positioning ensures your plants receive the right amount of light and support.
For Outdoor Gardens
- Place the pallet against a sturdy wall or fence.
- Ensure it gets at least 4–6 hours of sunlight per day for vegetables and most flowering plants.
For Indoor Gardens
- Position near a sunny window or under grow lights.
- Ensure airflow to prevent mold and mildew buildup.
Tip: If placing the pallet upright, angle it slightly backward to prevent soil from falling and make watering easier.
Step 8: Watering and Maintenance
Vertical gardens require consistent care, as soil can dry out faster than traditional garden beds.
Watering Tips
- Water thoroughly but gently, allowing water to reach all soil pockets.
- Consider drip irrigation or a watering can with a fine nozzle to avoid washing out soil.
Fertilizing Naturally
- Use compost tea, worm castings, or diluted organic fertilizers.
- Avoid chemical fertilizers, especially in indoor settings.
Regular Care
- Check for pests and remove them manually or with natural remedies like neem oil.
- Prune overgrown plants to encourage new growth and maintain the garden’s shape.
- Replace plants that don’t thrive to keep your pallet garden looking vibrant.
Step 9: Creative Enhancements
Pallet gardens are incredibly versatile, allowing for creative designs:
- Paint or stain: Add color to the wood for visual appeal.
- Add decorations: Small garden ornaments, fairy lights, or trellises can enhance aesthetics.
- Multiple pallets: Connect several pallets vertically or horizontally for a larger green wall.
- Seasonal rotation: Change flowers and herbs according to the season to keep your garden fresh and colorful.
Benefits of a Pallet Vertical Garden
Creating a vertical garden with pallets is more than just a creative project; it offers tangible benefits:
- Maximizes space: Perfect for urban apartments, balconies, or small yards.
- Eco-friendly: Reduces waste by reusing pallets and promotes sustainable gardening.
- Improves air quality: Plants filter pollutants and increase oxygen levels indoors.
- Reduces stress: Being surrounded by greenery improves mood and mental well-being.
- Fresh produce: Grow herbs, vegetables, and small fruits at home for fresh, chemical-free food.
Conclusion
Transforming simple pallets into stunning vertical gardens is a rewarding and environmentally friendly way to bring nature into your living space. From selecting the right pallet to planting, lining, and maintaining your garden, each step allows you to creatively express yourself while fostering sustainable gardening practices.
Whether you are a beginner or an experienced gardener, a pallet vertical garden provides a flexible, low-cost, and visually appealing way to grow plants. With careful planning, patience, and a touch of creativity, you can turn ordinary wooden pallets into vibrant green walls, aromatic herb gardens, or colorful floral displays that brighten any corner of your home or yard.
So, the next time you see a simple wooden pallet, don’t discard it—envision the lush vertical garden it can become. Your space, your plants, and your creativity can all thrive together in this eco-friendly, stunning garden solution.