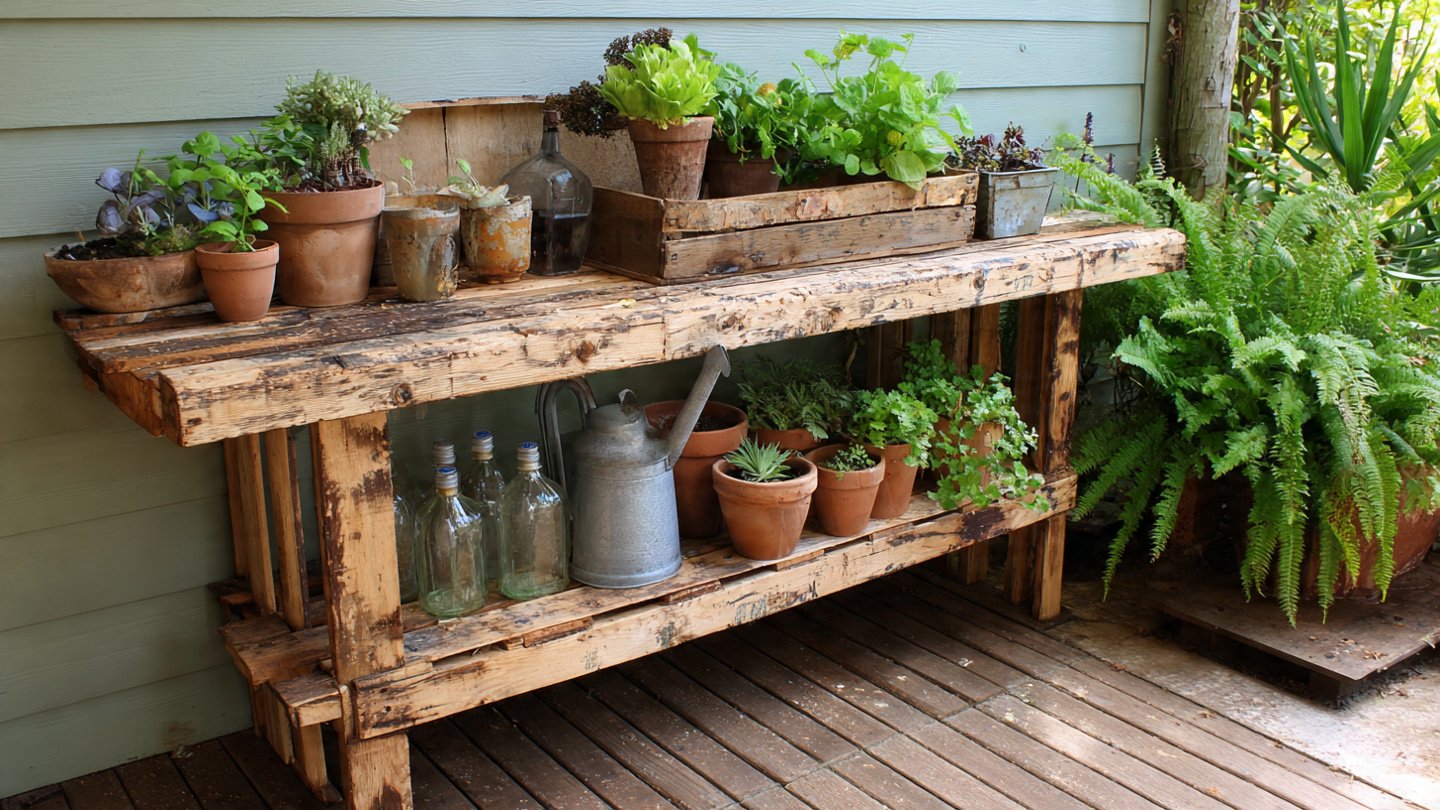
For gardeners and DIY enthusiasts alike, a potting bench is more than just a work surface—it’s a functional centerpiece for your gardening activities. However, purchasing a ready-made designer bench can be expensive. The good news is that you can transform old wooden pallets into a stunning, personalized potting bench without breaking the bank.
With a little creativity, some basic tools, and a few pallets, you can create a potting bench that is both practical and visually appealing, perfect for organizing tools, planting pots, and even displaying decorative plants. Here’s how to do it.
Why Use Wooden Pallets?
Wooden pallets are a favorite for DIY projects because they are:
- Affordable or Free: Many businesses give them away after delivery.
- Sturdy: Designed to carry heavy loads, pallets can support soil, pots, and tools.
- Versatile: Pallets can be disassembled or used whole for various designs.
- Eco-Friendly: Repurposing pallets keeps them out of landfills and promotes sustainable DIY.
By turning pallets into a potting bench, you’re not just saving money—you’re also creating a unique piece of garden furniture with character.
Materials You’ll Need
Before starting your project, gather the following materials:
Materials:
- 2–3 wooden pallets (depending on the desired size)
- Screws and nails
- Sandpaper or electric sander
- Wood stain or paint (optional for design)
- Waterproof wood sealant (for outdoor durability)
- Hinges (optional, if adding foldable elements or storage lids)
- Wooden planks (optional, for extra shelves or tabletop)
Tools:
- Hammer or electric drill
- Saw (hand saw or circular saw)
- Measuring tape
- Screwdriver
- Clamps (helpful for holding pallets while assembling)
Step 1: Plan Your Design
Before touching the pallets, sketch a rough design of your potting bench. Consider:
- Height: Typically, potting benches are 36–40 inches tall for comfortable gardening.
- Width and Depth: Ensure enough surface for potting but not so large that it overwhelms your space.
- Storage Needs: Will you include shelves, hooks, or drawers for tools?
- Aesthetic: Rustic, modern, or painted in bright colors—decide how you want it to look.
A clear plan will make assembly easier and ensure your bench fits your gardening space perfectly.
Step 2: Prepare the Pallets
1. Inspect and Clean Pallets
- Check for loose nails, broken slats, or splinters.
- Remove any damaged boards or protruding nails.
- Clean the pallets with a brush and soapy water; allow them to dry completely.
2. Sand the Wood
- Sand all surfaces to smooth rough edges and remove splinters.
- Focus on the tabletop area, as this will be your main workspace.
- Sanding also prepares the wood for paint or stain if you choose to finish the bench.
Step 3: Assemble the Base
Depending on your design, you can use one pallet as the main tabletop and another as a support base, or disassemble pallets for more flexibility.
Option 1: Whole Pallets
- Use one pallet as the tabletop and stack or attach a second pallet as a lower shelf.
- Secure the pallets together using screws or brackets.
Option 2: Disassembled Pallets
- Remove slats from one or more pallets.
- Reconstruct the tabletop with evenly spaced boards for a rustic look.
- Use the remaining wood to create legs and shelves.
Tip: Clamp the pieces together while screwing for added stability.
Step 4: Add Storage Features
A functional potting bench often includes storage for tools, soil, and pots. Here’s how to add it:
- Shelves:
- Attach a pallet or wooden planks under the tabletop for storing soil bags or pots.
- Adjustable shelves allow flexibility for different-sized containers.
- Hooks and Hangers:
- Screw hooks into the side or back of the bench to hang trowels, gloves, or watering cans.
- Drawers or Bins:
- Use small wooden crates or boxes as pull-out bins for seeds or small tools.
- Position them under the tabletop or on lower shelves.
Adding these features transforms your bench from a simple workspace into a well-organized gardening hub.
Step 5: Finish and Protect the Wood
To make your pallet potting bench durable and attractive, apply finishing touches:
- Stain or Paint:
- Stain enhances the natural wood grain, giving a rustic look.
- Paint adds color and personality to your garden space.
- Sealant:
- Apply a waterproof wood sealant to protect against rain, sun, and soil moisture.
- This ensures the bench lasts for years outdoors without rotting.
Tip: Allow each layer to dry completely before using the bench.
Step 6: Arrange Your Bench in the Garden
Placement matters for both convenience and aesthetics:
- Choose a flat, stable surface to prevent wobbling.
- Position near a water source for easy potting and watering.
- Ensure enough light for your workspace but consider shade if you prefer cooler conditions.
Adding decorative elements like small potted plants, herb jars, or hanging baskets around the bench can make it a visual focal point in your garden.
Creative Enhancements for a Designer Look
To elevate your pallet potting bench into a designer piece, consider these ideas:
- Mixed Materials: Combine pallets with metal brackets or a concrete countertop for an industrial-chic look.
- Foldable Features: Add a fold-down side table for extra workspace that tucks away when not in use.
- Decorative Backsplash: Attach a slatted wooden panel to the back for hanging tools or small planters.
- Personalized Paint: Stencil garden quotes or your family name for a customized touch.
- Lighting: Add solar-powered LED lights or string lights to illuminate your bench for evening gardening.
These details make the bench functional, stylish, and uniquely yours.
Benefits of a DIY Pallet Potting Bench
Creating a potting bench from pallets has several advantages:
- Cost-Effective: Minimal investment compared to store-bought benches.
- Eco-Friendly: Upcycling reduces waste and promotes sustainability.
- Customizable: You decide the size, style, and storage features.
- Personal Satisfaction: Building your own furniture adds a sense of pride and accomplishment.
Moreover, a well-designed potting bench makes gardening more organized and enjoyable, encouraging you to spend more time in your outdoor space.
Final Thoughts
Transforming old wooden pallets into a stunning designer potting bench is a rewarding DIY project. By carefully planning your design, preparing and assembling pallets, adding functional storage, and finishing the wood for durability, you can create a bench that is both practical and eye-catching.
From a simple work surface to a fully equipped gardening station, your pallet potting bench can become the centerpiece of your garden, organizing tools, displaying plants, and inspiring creativity. With a little time and effort, you’ll turn discarded pallets into a piece of sustainable, beautiful, and functional garden furniture.
So, grab your old pallets, some tools, and a bit of imagination—and start building a potting bench that will impress your friends and enhance your gardening experience for years to come.