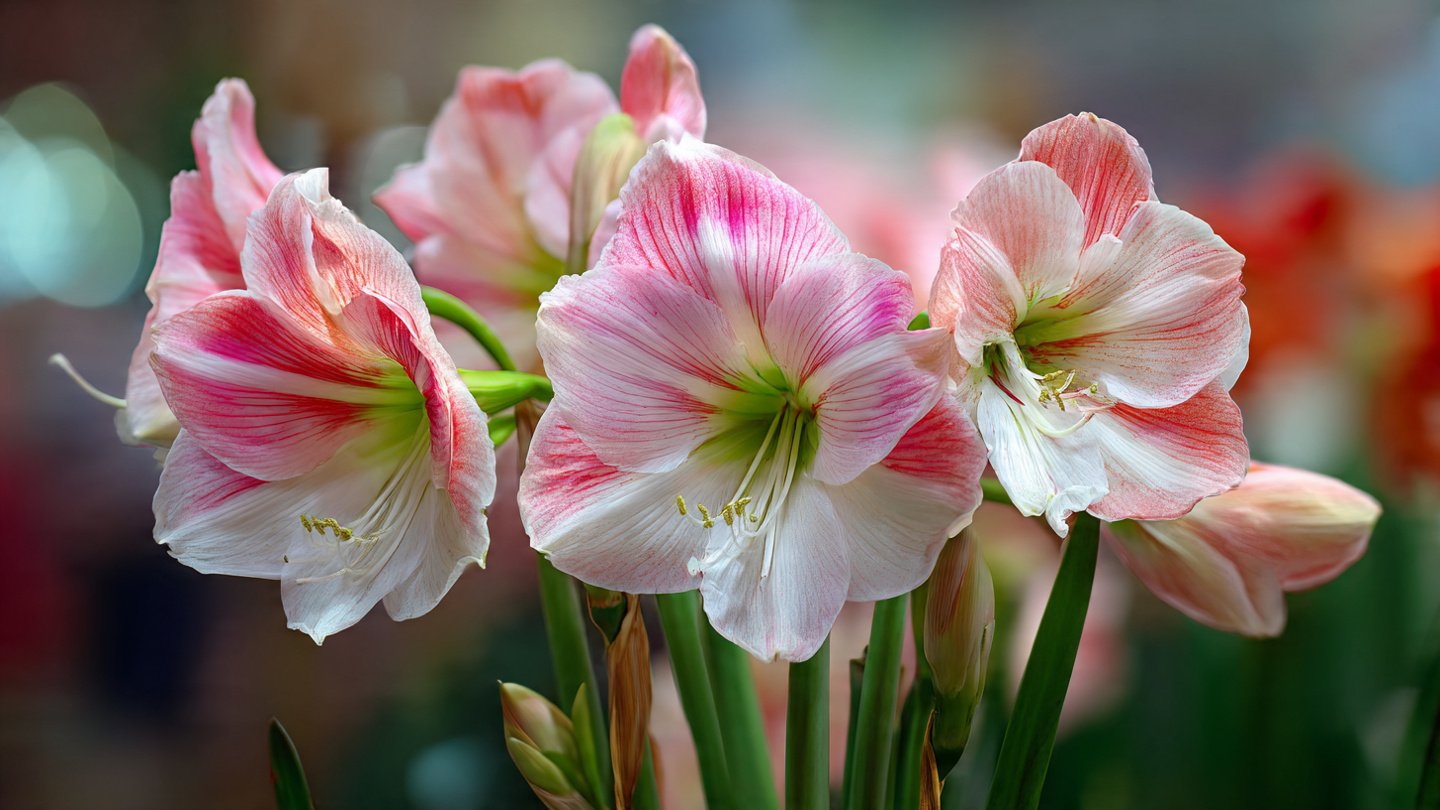
Amaryllis (Hippeastrum spp.) is one of the most striking flowering bulbs, known for its large, trumpet-shaped flowers that bring a burst of color into homes and gardens, especially during winter and early spring. The excitement of seeing an amaryllis bloom is unmatched, but many gardeners struggle to get their bulbs to flower year after year. The secret to consistent annual blooms lies in understanding the amaryllis lifecycle and giving it the right care during its dormant period. This guide will reveal how to ensure your amaryllis thrives and blooms beautifully, year after year.
Understanding the Amaryllis Lifecycle
Before diving into care techniques, it’s essential to understand how amaryllis grows. An amaryllis bulb goes through a growth, flowering, and dormancy cycle:
- Growth Phase – The bulb develops roots and foliage. This phase requires light, warmth, and water.
- Flowering Phase – The plant sends up a tall flower stalk (scape) and blooms. This usually happens in winter when grown indoors.
- Dormant Phase – After flowering, the bulb rests, storing energy for the next season. This is the most critical phase for ensuring future blooms.
Many gardeners fail to get amaryllis to rebloom because they don’t allow the bulb to properly enter and exit dormancy. The secret to annual blooms is mastering the dormancy cycle.
Choosing the Right Amaryllis Bulb
Start with a healthy, firm bulb. The size of the bulb influences bloom size and vigor:
- Large bulbs (6 inches or more) – Usually produce multiple flower stalks and larger blooms.
- Medium bulbs (4–5 inches) – Produce single stalks with moderate blooms.
- Small bulbs (under 4 inches) – Often take 1–2 years to reach full blooming potential.
Check the bulb for mold, soft spots, or shriveled areas. Healthy bulbs have firm, smooth outer layers and may show tiny root buds at the base. Selecting a strong bulb sets the foundation for reliable annual blooms.
Planting Your Amaryllis
Planting correctly is crucial for healthy growth and flowering:
- Choose a Pot: Select a pot slightly larger than the bulb, with drainage holes. Amaryllis bulbs like snug pots—too much soil can cause rot.
- Soil Mix: Use a well-draining potting mix, such as one formulated for bulbs or a mix of peat, perlite, and garden soil.
- Planting Depth: Position the bulb so the top third remains above soil. Planting too deep can delay or prevent blooming.
- Watering: After planting, water lightly to settle the soil. Overwatering can rot the bulb before it grows roots.
Once planted, place the pot in a bright location with indirect sunlight to encourage root development.
Encouraging Flower Stalk Growth
To get your amaryllis to bloom, focus on stimulating strong foliage and flower stalks:
- Light: Provide bright, indirect sunlight. South-facing windows are ideal. If indoors, rotate the pot weekly for even growth.
- Temperature: Keep the room at 65–75°F (18–24°C). Cooler temperatures may delay growth, while heat can stress the plant.
- Watering: Water sparingly until the flower stalk appears. Once the stalk emerges, increase watering to support rapid growth.
- Fertilizing: Use a balanced liquid fertilizer every 2–4 weeks. Fertilizer encourages leaf and flower development but avoid overfeeding, which can result in more foliage and fewer blooms.
A typical amaryllis will bloom 6–8 weeks after planting, producing 1–3 flower stalks per bulb.
The Simple Secret: Managing Dormancy
The key to ensuring your amaryllis blooms year after year is proper dormancy care. After flowering, the bulb must rest and rebuild energy for the next cycle:
- Cut the Flowers: Once blooms fade, cut the flower stalk near the base. This prevents the plant from wasting energy on seed production.
- Keep Foliage Intact: Allow the leaves to continue growing. Leaves photosynthesize and replenish the bulb’s energy stores. Continue watering and fertilizing during this period.
- Gradual Reduction: After 8–12 weeks, gradually reduce watering as the foliage begins to yellow. Stop fertilizing.
- Dormancy Period: Let the foliage die back completely, usually over 2–3 months. Store the bulb in a cool, dry, dark location at 50–60°F (10–15°C). This mimics winter conditions and signals the bulb to prepare for its next bloom.
Skipping dormancy or cutting back foliage too early is the most common reason bulbs fail to flower the following year.
Preparing Bulbs for Replanting
After the dormancy period, your amaryllis is ready to bloom again:
- Inspect the Bulb: Remove any dead or rotting material and check for healthy roots.
- Repot or Refresh Soil: Use fresh, well-draining soil if the previous soil has compacted or contains pests. Keep the bulb snug in the pot.
- Watering: Begin watering lightly to encourage root growth. After 2–3 weeks, the flower stalk should emerge.
- Placement: Move the pot to a bright, warm location with indirect sunlight to promote strong flower development.
Following these steps ensures that each bulb receives the energy and environmental cues needed to bloom consistently.
Additional Tips for Ensuring Annual Blooms
- Pot Size Matters: Don’t use oversized pots, as excess soil can retain moisture and cause rot.
- Fertilize Regularly: During active growth, feed every 2–4 weeks with a balanced fertilizer. Once dormant, stop fertilizing entirely.
- Support Flower Stalks: Tall amaryllis stalks can bend under the weight of blooms. Use stakes or supports if necessary.
- Monitor for Pests: Watch for aphids, spider mites, or mealybugs. Treat infestations early with insecticidal soap or neem oil.
- Rotate Bulbs: If you have multiple bulbs, stagger planting times to enjoy continuous blooms over several months.
- Temperature Control: Keep bulbs away from drafts, heaters, or direct hot sunlight, which can stress the plant.
By paying attention to these details, you can maximize the chances of your amaryllis producing large, vibrant blooms year after year.
Propagating Amaryllis
For gardeners looking to expand their collection, amaryllis can be propagated:
- Offsets: Mature bulbs produce smaller bulbs (offsets) attached to the parent. Separate and plant these after dormancy.
- Seeds: While less common for home gardeners, amaryllis can be grown from seeds. However, seedlings take several years to reach blooming size.
Offsets are the quickest way to ensure new flowering bulbs, extending the joy of amaryllis blooms across your garden.
Troubleshooting Common Problems
Even with proper care, problems can arise. Here’s how to handle them:
- No Bloom: Ensure the bulb had a proper dormancy period. Lack of light or over-fertilization can also inhibit flowering.
- Weak Stalks: Provide sufficient light, support tall stems, and avoid overwatering.
- Yellow Leaves: Natural after flowering. If leaves yellow prematurely, it could indicate root rot or insufficient nutrients.
- Rotting Bulbs: Avoid waterlogging during planting and dormancy. Remove any soft, mushy bulbs immediately to prevent disease spread.
Being attentive to these signs ensures your amaryllis remains healthy and vibrant for years.
Conclusion
Amaryllis is a spectacular bulb that can reward gardeners with stunning, trumpet-shaped blooms every year. The simple secret to consistent flowering is understanding and managing the plant’s dormancy cycle. By allowing leaves to photosynthesize after flowering, gradually reducing watering, and providing a cool, dry resting period, your amaryllis bulbs store the energy needed to bloom repeatedly. Combine this with proper planting, fertilizing, and pest management, and you’ll enjoy a garden full of elegant blooms year after year.
With patience, attention, and the simple dormancy secret, your amaryllis will become a reliable source of seasonal beauty, filling your home and garden with vibrant colors and natural charm for many years to come.