Why Use Recycled Bricks for Garden Borders?
Before getting into the “how,” it’s worth knowing why recycled bricks are such a smart choice.
- Sustainable & eco-friendly – Reusing bricks keeps materials out of landfills
- Budget-friendly – Often free or very cheap from demolition sites or salvage yards
- Timeless aesthetic – Aged bricks bring instant charm and warmth
- Durable – They handle weather, moisture, and foot traffic better than most edging materials
Unlike plastic or metal edging, brick borders age beautifully rather than looking worn out.
Step 1: Find the Right Bricks
Not all bricks are created equal, so sourcing matters.
Where to look
- Construction or demolition sites (ask first)
- Salvage yards and reclamation centers
- Old patios, chimneys, or pathways on your property
- Online marketplaces and community groups
What to check
- Avoid bricks that crumble easily
- Look for relatively consistent sizes
- Expect imperfections—variation adds character
Pro tip: Old clay bricks work better than modern concrete ones for a classic garden look.
Step 2: Decide on a Border Style
Your layout choice sets the tone for the entire garden.
1. Classic Straight-Line Border
Perfect for formal gardens or neat flower beds.
- Lay bricks horizontally end to end
- Keep height low for a clean edge
- Works well along paths and lawns
2. Vertical Soldier Course
For a bold, architectural feel:
- Stand bricks upright, narrow side up
- Creates a taller, more defined border
- Ideal for separating lawns from flower beds
3. Curved Cottage-Style Edge
Soft, relaxed, and natural:
- Follow the curves of garden beds
- Slightly uneven placement adds charm
- Great for wildflower or herb gardens
4. Diagonal or Herringbone Pattern
Adds visual interest:
- Lay bricks at an angle
- Best for larger borders where patterns can shine
- Complements pathways beautifully
Step 3: Prepare the Ground Properly
This is the step people skip—and regret later.
What you’ll need
- Spade or edging tool
- Gravel or sand
- Level
- Rubber mallet
How to prep
- Dig a shallow trench along your border line
- Make it slightly wider than the brick thickness
- Add a thin layer of sand or gravel
- Compact and level it
A solid base prevents shifting and keeps weeds from sneaking through.
Step 4: Lay the Bricks Like a Pro
Now comes the satisfying part.
- Place bricks tightly together
- Use a level every few bricks
- Tap gently with a rubber mallet
- Adjust as you go—don’t rush
For extra stability, especially in vertical layouts, set bricks slightly below soil level on one side.
Optional upgrade: Use landscape adhesive or mortar for permanent borders, but dry-laying works great for most gardens.
Step 5: Fill the Gaps and Finish the Look
How you finish the edges makes a big difference.
Filling options
- Soil for a natural look
- Gravel for contrast
- Sand for a clean, classic finish
- Low-growing plants like thyme or moss for softness
Let some plants spill slightly over the bricks—it makes the border feel integrated, not rigid.
Design Tips for a Stunning Result
- Mix brick colors instead of matching perfectly
- Pair brick borders with wood, gravel, or stone for layered texture
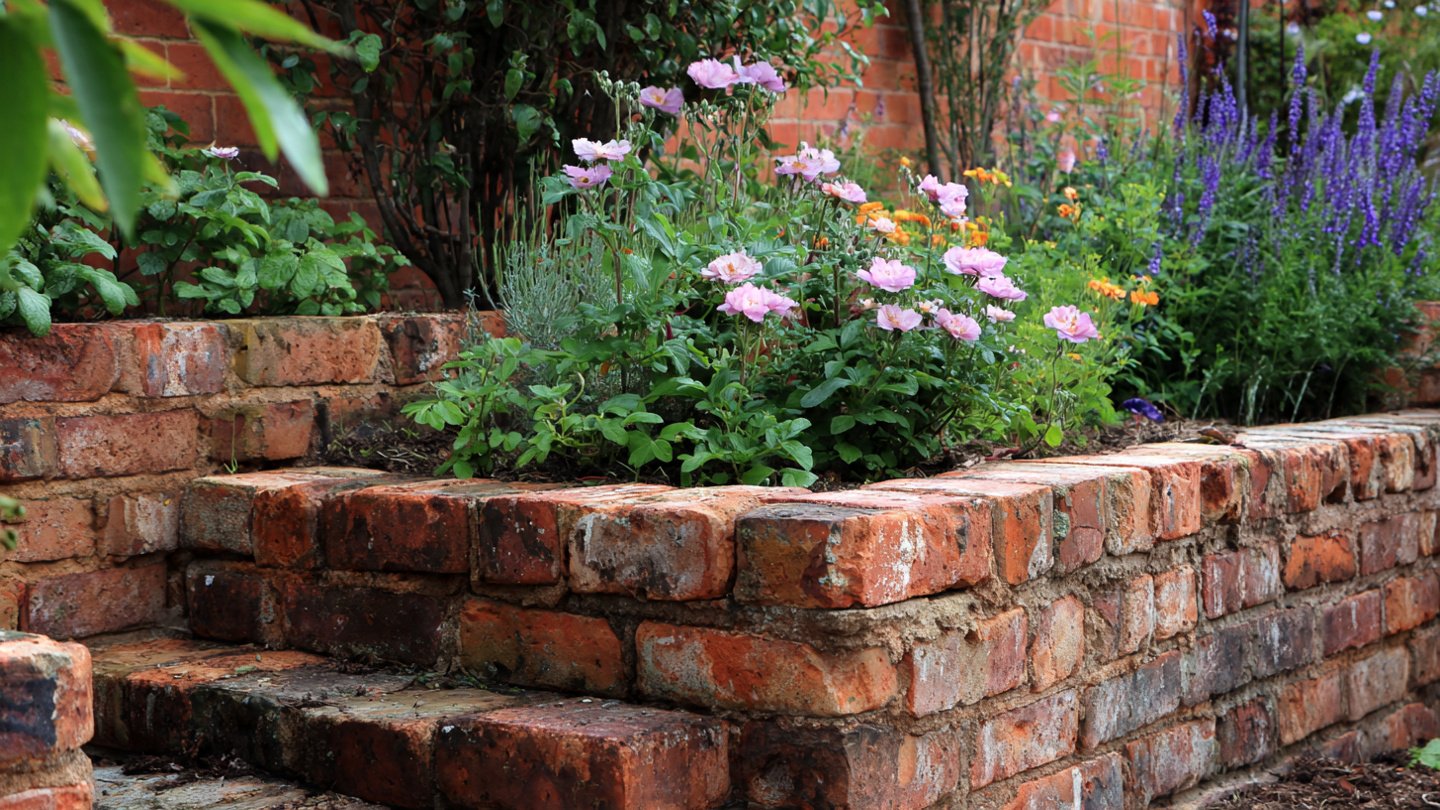
- Use bricks to frame raised beds or highlight focal plants
- Repeat the brick edge in different parts of the garden for cohesion
Old bricks look especially beautiful alongside greenery because their warm tones contrast with fresh foliage.
Maintenance Made Easy
Brick borders are low-maintenance, but a little care goes a long way.
- Pull weeds once or twice a season
- Re-level bricks after winter frost if needed
- Rinse with water to keep color fresh
- Let moss grow if you love a vintage look
Unlike plastic edging, bricks improve with age.
Why Recycled Brick Borders Instantly Upgrade a Garden
A brick border does more than separate spaces—it frames your garden like artwork. It gives plants structure, defines paths, and creates a sense of intention. Recycled bricks add history and personality, making even a simple garden feel thoughtfully designed.
Best of all, this is a project you can complete in a weekend, with minimal tools and maximum impact.
Final Thought
Transforming your garden with recycled bricks isn’t just about aesthetics—it’s about creating something lasting, sustainable, and uniquely yours. With thoughtful placement and a bit of patience, those old bricks can become the detail that pulls your entire garden together.
If you’d like, I can also help you:
- Choose the best border style for your garden size
- Create a matching brick pathway
- Combine brick borders with raised beds or herbs
Just tell me 🌱