Papaya, also known as pawpaw in some regions, is a tropical fruit loved for its sweet, juicy flesh and numerous health benefits. Rich in vitamins A, C, and E, along with digestive enzymes like papain, it supports immunity, improves digestion, and promotes radiant skin. While papaya is commonly found in supermarkets, growing your own papaya plant at home can be incredibly rewarding—and surprisingly easy, even if you have limited space. With the right guidance, you can grow a healthy papaya plant that produces fruit quickly, often within 6 to 12 months.
This step-by-step guide will help you cultivate a papaya plant at home efficiently, from selecting seeds to harvesting delicious fruits.
Why Grow Papaya at Home?
Growing papaya at home offers several advantages:
- Freshness and Flavor: Homegrown papayas taste sweeter and more aromatic than store-bought ones.
- Nutritional Benefits: You have access to fruits free from pesticides and chemicals.
- Fast-Growing Crop: Papayas grow quickly and start producing fruit within a year under optimal conditions.
- Compact Cultivation: Papaya can be grown in pots or containers, making it perfect for balconies or small gardens.
- Year-Round Production: With proper care, papaya plants can produce fruit throughout the year in tropical and subtropical climates.
Step 1: Selecting Papaya Seeds
The first step in growing papaya at home is choosing the right seeds. There are three main types of papaya plants:
- Male: Produces only flowers, no fruit.
- Female: Produces fruit when pollinated by male plants.
- Hermaphrodite: Contains both male and female flowers and can self-pollinate, making them ideal for home gardeners.
For fast and reliable fruit production, hermaphrodite seeds are the best choice. You can buy high-quality papaya seeds from nurseries or online stores. Choose fresh seeds from ripe fruits for better germination.
Step 2: Preparing Papaya Seeds
Papaya seeds have a hard outer coat, so proper preparation improves germination rates.
- Extract Seeds: Scoop seeds from a ripe papaya.
- Clean Seeds: Rinse seeds under running water to remove the gelatinous coating.
- Dry Seeds: Spread them on a paper towel and let them dry for 1–2 days. Avoid prolonged sun exposure, which can damage the seeds.
- Optional Scarification: Gently nick the seed coat with a small knife to help water absorption and speed up germination.
Step 3: Germinating Papaya Seeds
Germination is the most crucial stage for fast results. Follow these steps:
- Choose a Container: Use seed trays, small pots, or even biodegradable cups.
- Use Well-Draining Soil: A mixture of garden soil, compost, and sand in equal proportions works best.
- Plant Seeds: Sow seeds about 1 cm deep. Cover lightly with soil.
- Water: Moisten the soil evenly but avoid waterlogging.
- Provide Warmth: Papaya seeds germinate best at temperatures of 25–30°C (77–86°F). Cover the tray with a plastic sheet or clear dome to retain warmth.
- Germination Time: Seeds usually sprout within 2–3 weeks. Keep soil moist during this period.
Step 4: Transplanting Papaya Seedlings
Once seedlings develop 3–4 true leaves and are about 10–15 cm tall, they are ready for transplanting.
- Select a Planting Spot: Papayas require full sun and well-draining soil. If growing in a pot, use a container at least 20–30 liters in size.
- Soil Preparation: Mix garden soil with compost and sand to create a fertile, loose, and well-draining medium.
- Transplant Carefully: Gently remove seedlings from the nursery container without damaging the roots.
- Planting Depth: Plant the seedling slightly deeper than its previous depth to support stem stability.
- Watering: Water immediately after transplanting to reduce transplant shock.
Step 5: Caring for Papaya Plants
Proper care ensures fast growth and early fruiting. Here’s a detailed care guide:
1. Watering
Papayas need regular watering, especially during hot weather. Keep the soil consistently moist but avoid waterlogging, which can cause root rot. A drip irrigation system or self-watering pots can be convenient for container-grown papayas.
2. Sunlight
Papayas thrive in full sun. Ensure the plant receives at least 6–8 hours of direct sunlight daily. If grown indoors, place the pot near a south-facing window or use grow lights to supplement sunlight.
3. Fertilization
Papayas are heavy feeders. Use organic fertilizers like compost, well-rotted manure, or balanced NPK fertilizers every 4–6 weeks. A fertilizer rich in potassium promotes flowering and fruit development.
4. Mulching
Mulch around the base of the plant with straw, dried leaves, or coconut husk. Mulching retains moisture, suppresses weeds, and keeps the soil temperature stable.
5. Pruning
Papaya plants do not require extensive pruning, but removing damaged leaves and lower suckers can help improve airflow and prevent disease.
Step 6: Pollination and Flowering
Papayas produce flowers on their stem, and flowering usually starts 5–6 months after planting. If you are growing a hermaphrodite variety, pollination occurs naturally, and fruits will develop quickly. For female plants, ensure at least one male plant is nearby for successful pollination.
Step 7: Pests and Disease Management
Papayas can attract pests and diseases, but proactive care helps prevent problems:
- Aphids and Whiteflies: Spray neem oil or insecticidal soap.
- Fruit Flies: Cover developing fruits with paper or cloth bags.
- Powdery Mildew: Ensure good spacing and airflow. Remove affected leaves.
- Root Rot: Avoid overwatering and ensure proper drainage.
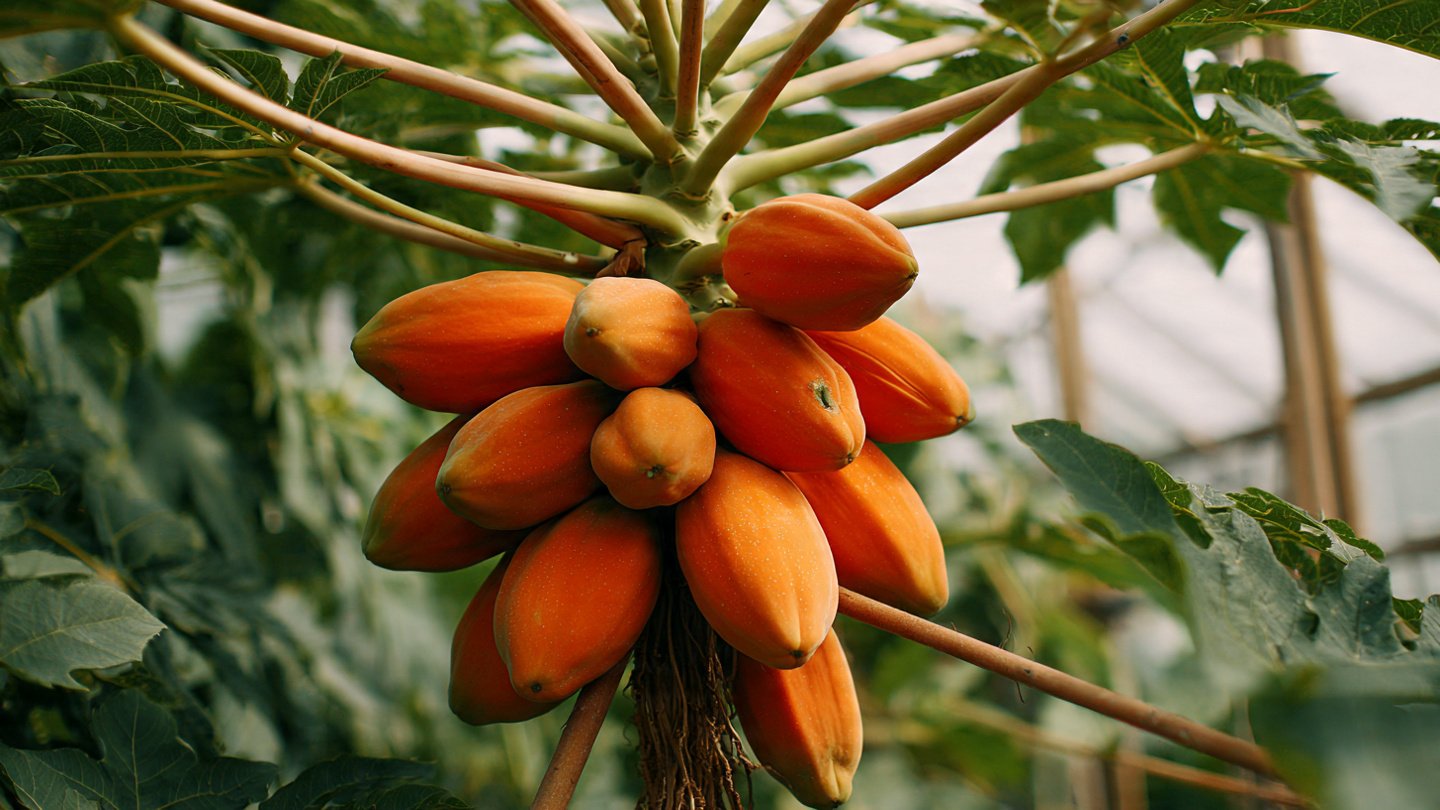
Step 8: Harvesting Papaya
Papayas grow quickly, and you can harvest them in as little as 6–12 months from planting.
- Signs of Ripeness: Fruits turn from green to yellow-orange and develop a sweet aroma.
- Harvesting Technique: Use a sharp knife or pruning shears to cut the fruit from the stem. Avoid pulling, as this can damage the plant.
- Handling: Handle fruits gently to avoid bruising.
Step 9: Tips for Faster Results
- Choose Hermaphrodite Seeds: Ensures early and reliable fruiting.
- Warm Growing Conditions: Papayas thrive in tropical temperatures. Use plastic covers or greenhouse techniques in cooler climates.
- Frequent Fertilization: Feed with potassium-rich fertilizers to encourage flowering and fruiting.
- Avoid Overcrowding: Give each plant at least 1–2 meters of space or use large containers.
- Proper Mulching and Watering: Helps reduce stress and promotes fast growth.
Benefits of Growing Papaya at Home
- Health Boost: Fresh papayas are rich in antioxidants, vitamins, and digestive enzymes.
- Cost Savings: Growing your own fruit saves money in the long run.
- Gardening Enjoyment: Easy-to-grow papayas provide a rewarding gardening experience.
- Sustainability: Reduces dependency on store-bought fruits and avoids packaging waste.
- Continuous Supply: With proper care, papaya plants can produce fruits throughout the year.
Conclusion
Growing your own papaya plant at home is a simple, enjoyable, and rewarding process. By selecting quality seeds, preparing the soil, and following proper care guidelines, you can enjoy fresh, juicy papayas right from your balcony, terrace, or garden. Papayas grow fast, and with a few months of attention, you can see flowers and fruits forming, giving you an abundant harvest that is both nutritious and delicious.
Whether you are a beginner gardener or an experienced plant lover, papayas are a perfect choice for home cultivation. Start with hermaphrodite seeds, provide plenty of sunlight, water consistently, and fertilize regularly. With this step-by-step guide, you’ll be on your way to growing healthy, fruitful papaya plants and enjoying the sweet taste of homegrown tropical goodness.